Wednesday, February 8, 2017

Swiss Miss - L'Art de la Guerre AAR

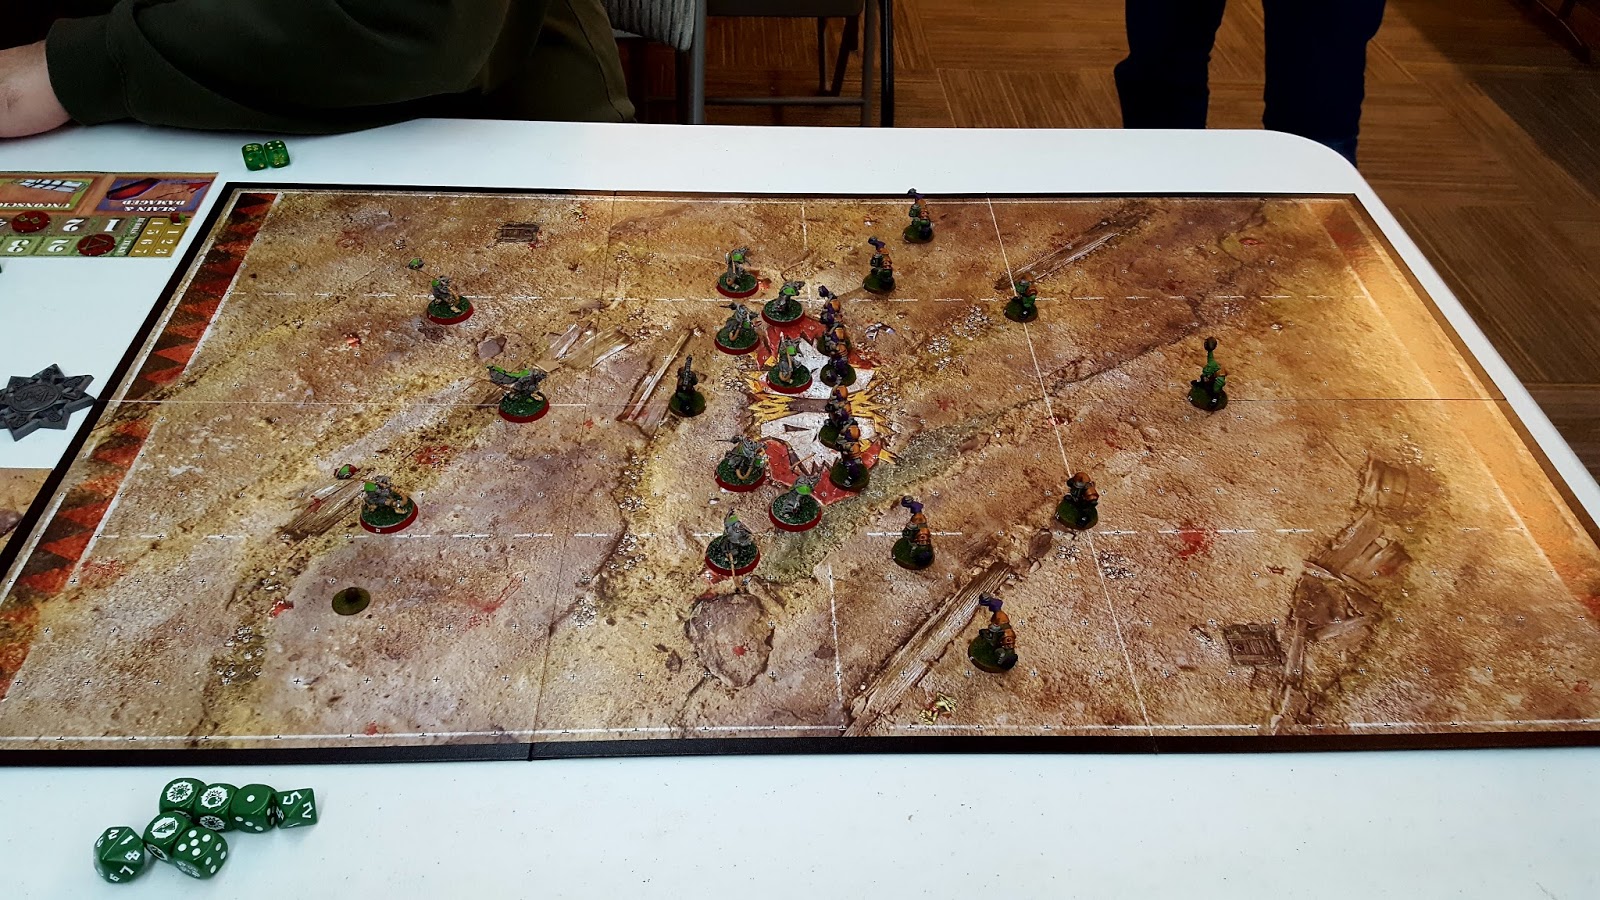
I had the chance to play a game of L'Art de la Guerre against Chris. He provided the armies and terrain - all I had to do was to do was pick a side and try to roll some 6's. 


I chose the Swiss and ended up defending, which left the attacking Polish to Chris. I had a small command of Impact Heavy Knights and Light Cavalry, and two commands of Elite Pikemen, Halberdiers, and Handgunners.

Opposing the Swiss were two commands of Impetuous Heavy Knights, Impact Heavy Cavalry, Medium Mounted Crossbowmen, and Light Horse, and an infantry command of THW Medium Swordsmen, mixed Spearmen/Crossbowmen, and Light Infantry.


During the first turn, both commands shifted forward, with the Light Infantry/Horse getting into ranged combat.


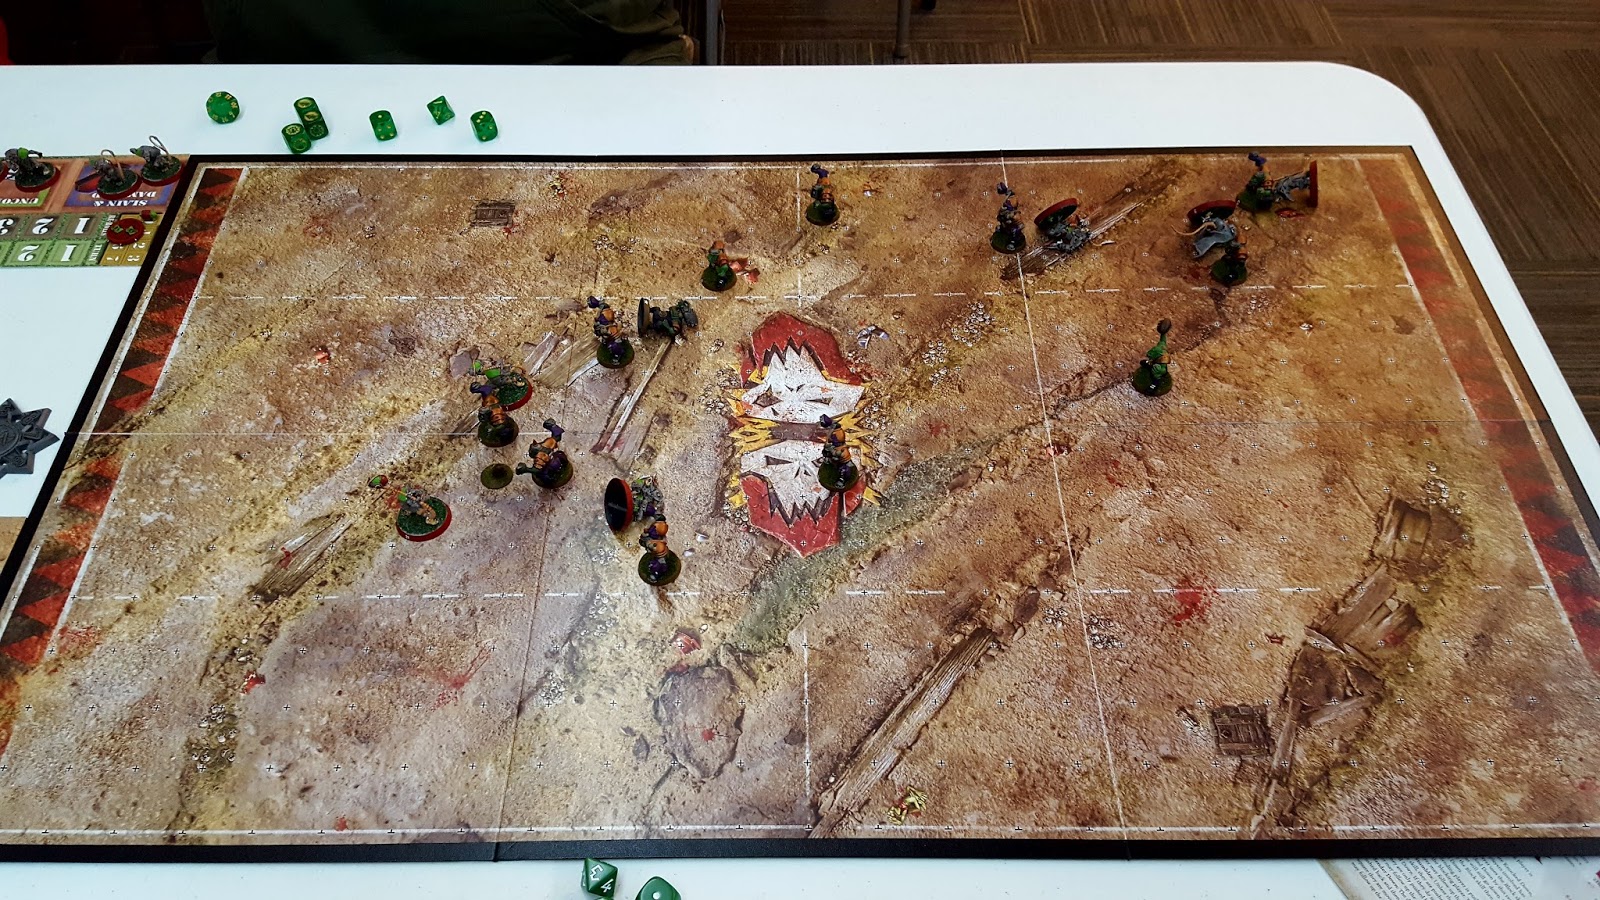
With an army made up of mostly Heavy Infantry, I wasn't exactly eager to move forward, especially with that large command of cavalry on my left. I did manage to chase off a Light Horse unit.


Unfortunately, I had to move up to try and chase off the light horse that were harrying my right flank. It was around this point that I began to realize that I had made a mistake during deployment - it would have been much more advantageous to face the cavalry horde with the pikes, and the smaller Polish cavalry force with my own mounted units. 


Of course, the best way to cover those kinds of mistakes is to get stuck in. All of my commands charged in this turn, after Christ hit and routed my Light Horses.


The combats went as about expected. The Pikemen in the center saw off most of the Polish Infantry, the Light and Medium mounted units on the right retreated, while my Knights were slowly being ground down.


With the Polish center command gone, I started to wheel my Pikemen to the left to face the oncoming cavalry. The smaller polish cavalry group was split into multiple parts as a couple units of Light Horse were run off the table.


My cavalry command was wiped from the table, but I managed to reach the Polish fortified camp.


We decided to finally call the game. We weren't entirely sure who won/lost - the Swiss had a number of disordered Elite units, but the Polish were mostly wiped from the table.

It was a fun game, and I finally got to see what all the buzz was about this ruleset. It's a lot less complicated than the QRS would lead one to believe.

Monday, February 6, 2017

Baltimork Corviks vs. Warpfire Vagabonds, League Game - Blood Bowl AAR

Kevyn and his Vagabonds were my scheduled opponents for last week's Blood Bowl league, so the Corviks took the field against the rats. The Vagabonds were being joined by Hakflem Skuttlespike.


Kevyn won the toss and elected to receive in the first half.


The Vagabonds made a push up one side of the pitch, until an unlucky dodge rule sent a rat to the ground.


Without many target, the Corviks hit what they could reach, while making a rush for the ball.


The Vagabonds tried to keep the ball away, but the unready Gutter Runner let the grotskin slip through his paws.


Sensing an opportunity, the Corviks put a beating on the Vagabonds. Somehow, a Black Orc managed to retrieve the ball.


The Vagabonds moved in, ready to take a few blows if it meant keeping the Corviks from breaking free and scoring.


The Corviks pushed back, gambling on wasting the clock before running the ball in.


But in a stunning turn of events, the Vagabonds knocked the ball loose!


The Vagabonds got the ball down the pitch, but lost the ball in a Corvik scrum.


The Corviks retrieved the ball and sent it flying right back.


With their numbers on the pitch dwindling, the Vagabonds tried their best to get at the ball.


But the Corviks couldn't be stopped, and ran the ball in for a point, ending the first half.


The game recommenced with the Vagabonds kicking.


The orcs' lack of creativity saw them gather up in a cage.


The Vagabonds fell back, waiting to see which way the cage would go.


It seemed as though the Corviks might try to run the ball up the unprotected flank.


The Vagabonds' speed allowed them to move to block the orcs.


Realizing subtlety wasn't their strong point, the Corviks decided to ram through the center.


The Vagabonds tried to jam up the progress of the orcs.


The Corviks tried breaking through, but a double-skull results saw a Corviks Blitzer go down to the ground.


The ball was open, but Nuffle's presence on the field was evident as a Vagabond trips while trying to get away from a Black Orc.


The Corviks take advantage of the lucky break, moving the ball up the pitch.


The Vagabonds made one last attempt to retrieve the ball, but failed. The Corviks ran the ball in for another point.


With only a few turns left in the second half, the Vagabonds were looking to at least get on the scoreboard.


The rats pushed hard down one side of the pitch.


An orc Blitzer failed to move away from Hakflem, but was tripped up by the Skaven Star Player.


The Vagabonds rushed into the open space, getting ready to break for the endzone.


The Corviks tried getting to the ball carrier, but couldn't push through the squeaking mass. The Skaven managed to make a gap large enough for the Gutter Runner to squeeze through and run the ball in for a point. And so the game ended with the Corviks winning 2-1.

Wednesday, February 1, 2017

Scattered into Atoms - Retro Raygun AAR

Carl put on a demo game of Retro Raygun for Gary and me. 


We had a suitably eye-searing combination of terrain. Gary took the Imperials, while I commanded the Valkeeri. The lists were fairly simple: two squads and a commander each. While the Valkeeris were coming straight out of the book, the Imperials were of Carl's own design.

The scenario was pretty simple - be the last one standing!


I won initiative and advanced a Valkeeri squad forward with the commander attached. A lucky round of shooting saw an Imperial squad retreat from the table, leaving the stunned Imperial commander out in the open.


The Imperial commander hightailed it over to the remaining rifle squad. 


The second Valkeeri squad moved up in support.


During the next turn, both sides moved forward, looking for a shot.


The Imperials got the drop on a Valkeeri squad in the open.


The poor ladies were vaporized!


The two squads faced off against each other.


The Imperials ducked into cover behind the local flora.


The Valkeeris advanced, looking to use their superior, if shorter-ranged, indirect fire.


But a lucky shot from the Imperials own indirect fire, which was weaker but had a loner range, took out the Valkeeri commander.


Undaunted, the ladies reached cover and fired overheard, but were unable to connect.


The Imperials fired again, forcing the Valkeeris to retreat.


Winning initiative, the Imperial troopers rushed to get a clear firing lane at the Valkeeris before opening fire.


The incoming fire was too hot for the Valkeeris, and they quit the field of battle in a mad scramble, leaving victory to the Imperials. 

We set up a second time, with Gary taking the Zenithians (with stats provided by Carl), while I had the Imperials. While the game lasted longer than the first, the Imperials eventually won out, with two squads brawling against a single surviving Zenithian squad. 

From these two games, we realized that a lot of terrain needed (the second game saw a rearranging of the table, with bushes scatted to break up the open spaces). A squad out in the open has a good chance of getting wrecked. We also figured that the Imperials may have been a little too beefy for their value, where they could out-shoot, out-brawl, and out-defend other equally pointed squads. 

We had fun, though, and the rules were simple enough to pick up quickly. Apparently Gary has some Robot Legion models, so we can expect those on the table in the future. 

Tuesday, January 31, 2017