Wednesday, March 16, 2022

'One' for the History Books - To the Strongest! AAR

At this month's SJGA meeting, Bill ran a game of To the Strongest!

This was a refight of his Romans vs Germans scenario which I wrote a blog post about three years ago; what a different world that was!

The previous battle ended with a decisive Roman victory. Could the Legions find repeat glory in another win?  


For this scenario, the Germans had the larger force and so would be on the attack. Each side had three commands, split up into three separate battles. 


Phil and Tim clashed by a small stream, commanding Germans and Romans respectively. 


Sam was the center Roman commander, while I controlled the German center. 


And Dick and Bob fought on a relatively open flank, with their German and Roman forces. 


Tim's command contained all of the Roman cavalry, which mean Phil was hard pressed to defend against the more agile force. 


In the center, Sam quickly shifted his legions to block my light cavalry, stopping them from going after the Roman camps. 

Poor chit pulling from both sides kept much from happening, however. 


On the German right flank, Bob and Dick fought a grinding action, shield against shield. Both sides waited for an opening to exploit. 


While Phil and Tim were mostly managing to do damage to their own units by attacking, eventually the scrum broke in Phil's favor as Tim lost a unit of cavalry. 


The fight in the center also decisively swung in favor of the Germans, with same losing two legion units without causing any lasting casualties. 


And around the same time, Dick finally broke through Bob's lines and turned the flank.


With all those losses, the Romans finally reached their breaking point, fleeing the battlefield. This was a crushing victory for the Germans, a complete reversal of the previous time I'd played. The Germans hadn't lost a single unit over the course of the game. 

This was partially due to really bad command pulls from all sides. Despite having an even distribution of chits numbering 1 through 10, it seemed like both sides couldn't trip over their own feet, leaving attacks or reformations half finished. 

Wednesday, March 9, 2022

Leadership Skills - Sharp Practice AAR

This past week's game at Ted's was my first opportunity to play Sharp Practice. It's one of those rulesets that you hear a lot about in the historical side of the hobby; usually in terms of endearment or revilement. 

This was the second time Ted was running this scenario. The previous week's game used Muskets & Tomahawks, which I missed. The overall opinion of the rules weren't great, with the players saying it felt clumsy and took too long to go through. 


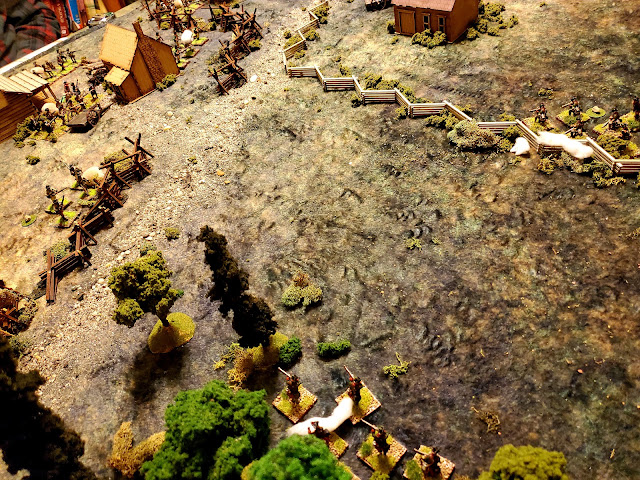
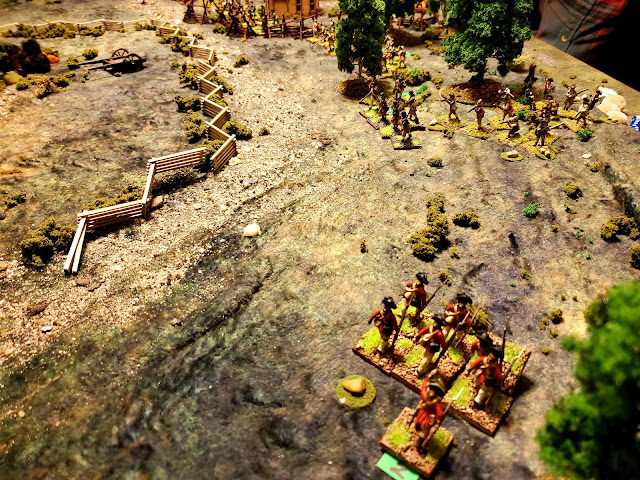
The scenario was set early in the American War of Independence, with untested American Continentals and untrained militia squaring off against a combined force of British and Hessian infantry. 

Ted was gamemastering for us. Chip and Steve commanded the Americans, while John and I played the British and Hessians, respectively. 

Unlike the Muskets & Tomahawks game, where the two sides fought over an arbitrary set of objectives, this was a straight-up fight with both sides aiming to reduce the others' morale. 


Chip's militia were the first to filter onto the table, making their way past a couple small buildings. 


John's British came on at a brisk pace in a formation of three groups. 


At the end of the first turn, the battlelines were starting to form. The Americans were moving through the woods as the Hessians tried to catch up to the British on the far side of the farmstead. 


My Hessian Jaegers were the only rifle-equipped units on the table, giving me a range advantage (with a rate-of-fire disadvantage). 


John ordered his Regulars to hold and aim, waiting for another turn to hit the American skirmishers with a volley. 


And my Jaegers continued to be a nuisance, with Chip losing one of his Big Men from their rifle fire. 


John's initial volley looked spectacular (with a lot of dice!) but failed to do much damage. 


My Jaegers continued to trade fire with Chip's infantry, although I was more nervous at the number of militia approaching from the distance. 


One quick turn ended with a house suddenly catching fire! Maybe it was an unattended fireplace, or maybe a jostled candle?


To Chip's frustration, my Jaegers wounded another of his leaders, leaving the American's right wing stalled with no leadership. 


While Chip's flanking maneuver was halted, the Americans did have a decent line that forced the British and Hessian fire to be spread out instead of hitting single groups. This helped keep the Americans in the fight despite the initial morale losses. 


And they would need the help! John's invincible light infantry seemed untouched, despite a hail of lead fired from the Americans. His Regulars split into two groups, one moving to flank the militia in the woods. 


This would see the main battlelines form, with the Americans taking cover in the treeline and the British firing from within the farmstead. 


The Hessian Grenadier and Fusiliers finally managed to get into the fight, but the distance, light cover, and numbers of American militia saw the damage spread too thinly to have an effect. The Hessians didn't take any casualties from return fire, but started to accrue Shock. 


John's redcoats were taking a beating from the militia. Sharp Practice doesn't seem to differentiate much between the shooting abilities of militia and trained soldiers, apart from being able to take certain actions like 'Present' or 'Sharp Practice.' This means a horde of poorly trained troops can still put the hurt on trained troops, as Steve was able to do. 


For several turns, this is how the battle looked. The Americans had formed a decent line with their militia horde, while the much patchier line of British and Hessians were managing to hold but taking casualties. 

Chip's wounded leader on the far left recovered and gave the Jaegers a terrible blow. Between that and a 'Dampened Powder' random event, the Jaeger unit was effectively useless. I had to pull them back, rather than let them take any more hits and risk a loss to our side's Morale. This left the flank open for Chip to advance. 

Steve's militia also finally managed to hit the Light Bobs, forcing John to start withdrawing the group lest they also be lost.


However, with how John was rolling (see above; in Sharp Practice, rolling low saves lives), the British seemed invincible! Just ignore the casualties off to the side of the table, there. 


Another random event forced John's flanking group of British Regulars to charge towards the American lines. If they had gone just an inch further, it may have gone badly for the outnumbered redcoats. 

After a few more exchanges of fire, and at the primping of the assembled players, Steve ordered his Militia to charge into the isolated British group. 

In an unexpected turn of events, the British gave better than expected and the Americans ended up fleeing. 

We decided to end the game there as it was getting late. While the British were currently in the lead (8 morale points to the Americans' 5), had the game gone on for longer it may have swung the other way. As I mentioned earlier, the Americans had the greater number and could both put out more shots and spread return fire out through there lines. 

This was a great scenario to learn the rules, so I'm looking forward to playing again, hopefully with some more space to maneuver or with different objectives. But overall, this is yet another win for the Lardies when it comes to writing fun rules that I enjoy. 

Wednesday, March 2, 2022

One Force, Two Force, Red Force, Blue Force - The Battlefield AAR

The other game I played at the wargaming meetup was The Battlefield. I was really pleased to finally get a chance to play. I've known about this set of rules for some time now (there's even a half-finished WW2 adaption somewhere in my Google Drive...). It's goal is to simulate playing a First-Person Shooter on the tabletop, with a fantastically innovate action point system. 


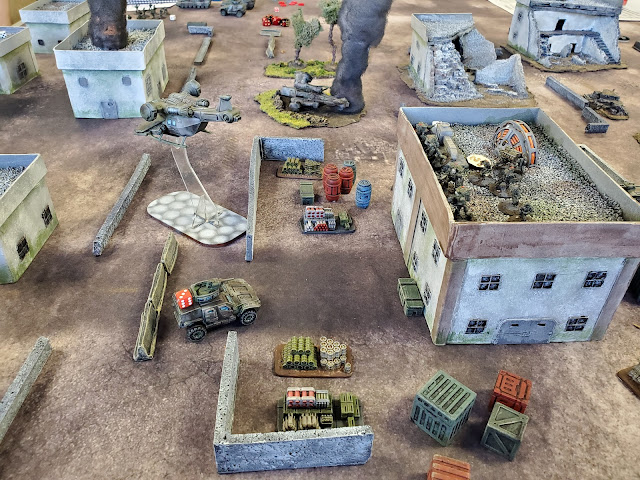
Ben (who was running the game) had used the game's near-future options with some house rules for his scenario. In a war-torn city, two opposing forces have located a munitions dump with critical supplies. 

Blue Force was smaller and more elite, with a Spec Ops team, an Engineering Team, a Sniper team, two Assault Teams, a VTOL, and two armored transports. They also had two reinforcement points. 

Red Force had two Assault Teams, a Support Team, and Grenadier team, a Tank, a heavy APC, and armored transports. They had four reinforcement points. 


I was one of two Red Force commanders, controlling the Support and Grenadier teams and the two armored transports. 

Blue Force quickly captured the munitions dump by using their VTOL to drop the Spec Ops team onto the roof. 


With the heavy cover provided by the munitions building (and the heavy weapons restrictions - neither side wanted to blow the entire supplies cache up and level multiple city blocks!), Red Force was stuck trying to suppress the Blue Force infantry that was occupying the buildings. 

Meanwhile the Blue Force VTOL swung around to the side and started hammering the Red Force Tank and APC with its Rockets and Chain Guns. 


Dismounting from their transports, the Red Force infantry had to keep their heads down as they approached the munitions building. 


Unfortunately, it didn't take long for the VTOL to deal with the Tank and APC, both falling to a hail of Chain Gun fire. After making sure the Red Force infantry were tucked safe and sound in the nearby buildings, the VTOL returned back to the munitions building to provide cover to the Blue Force infantry inside. 

The Red Force transports took even less time for the VTOL to sort out, and a desperate CQC charge by Red Force infantry into the upper floors of the building fizzled out. 

With that, Red Force decided to retreat rather than try and press forward. With no mechanized support, and the VTOL patrolling the area, it would have taken a miracle for the reinforcements to reach the munitions dump. 

Ben ran a great game (which looked amazing - the smoke columns had little tea lights in them to simulate the flickering flames) and I'll happily look forward to playing more of The Battlefield in the future. 

With the (currently) ongoing invasion of Ukraine, I've been reflecting on my willingness to play games set in "modern" eras; anything from Vietnam to "ultra-modern." While The Battlefield is intended for use with modern conflicts, I think I'd rather adapt them to WWII, or use them with scifi minis like Ben has done. 

Wednesday, February 23, 2022

A Classic Clash - Command & Colors: Ancients AAR

Last weekend I made my way up to Pennsylvania to check out a local wargaming group that, while I've known about for some time, I've never had a chance to check out. 

I was very warmly welcomed by the attendees, and even got a chance to play in a couple games!


My first game was Command & Colors: Ancients, run by Cy and using his fantastic 28mm miniature collection instead of the original wooden blocks. 

A classic matchup of Carthaginians and Romans, both sides were looking to reduce the enemy force down to 8 units. 

The Romans were mostly made up of Medium and Light Infantry and Cavalry. The Carthaginians had some Medium and Light troops, but also had a mix of Warriors and Heavy Infantry as well. 


The first clash occurred up on the nearby hill, with Punic cavalry slamming into each other. Both sides managed to lose their generals, but the Romans ended up with the advantage (especially with some hot dice rolls). 


With more Light Cavalry on the Carthaginian right flank, the Italian allies were reluctant to leap into the waiting spears of the heavy Libyan infantry. 


In the center, I had hoped to use a card combination to get the jump on the Gallic Warrior warbands before they could, but I got Hannibal'ed and the Gauls surged forward into the Roman lines. 


The Carthaginians absolutely slaughtered the Roman center, trading their Gallic allies for the Roman Hastati, Principes, and Triarii. The Romans also lost their center General. 

It was a bloodbath on both sides, but the Roman flanks managed to eke out a victory. Allied Italians on both flanks (cavalry and infantry) caused just enough casualties to push the Carthaginians over the break limit. 

I really enjoyed the game. C&C:A is very quick to learn, with Cy able to teach four new players in just two-and-a-half hours. I may have to finally pick up a set myself. 

Wednesday, February 2, 2022

Painting Update - Romans

Here's an update on what I've been working on. 


I'm still trying to get through the 15mm Punic War project that I'm splitting with Josh. As he works on his Carthaginians, I'm technically done on the Romans. 


This will give me two Roman commands for use in games, Caeruleus and Rubeus.


They're pretty easy to add on to if need be. Hail Caesar asks for a 2:2:1 ratio of Hastati, Principes, and Triarii. I followed that for the basic roster of each command, with a pair of Velites units to cover the formed infantry. 


In a test game with Josh, it seemed to work well. Five formed units (seven total) gives enough choices for maneuvering, but doesn't bog down in command rolls. 

The next two command will consist of Italian allies; one command of infantry, and other command of cavalry.