Wednesday, October 4, 2023

So Long, Solachon! - So Convenient for Hewing AAR

Barrage 2023 was a couple weekends ago, and I haven't had a chance to attend since 2019. While I wasn't able to take off from work to attend Friday, I signed up for a couple games on Saturday. 


My first game was a playtest/demonstration of the "big battle version" of a ruleset, "So Convenient for Hewing", run by the author himself. 

The scenario was based on the Battle of Solachon, between the Byzantines and Sassanid Persians. I played the scenario with a team of father-and-sons (Rob, Norman, and Will if I remember correctly) from the HAWKS group. Will and I played as the Sassanids, while Rob and Norman commanded the Byzantines. 


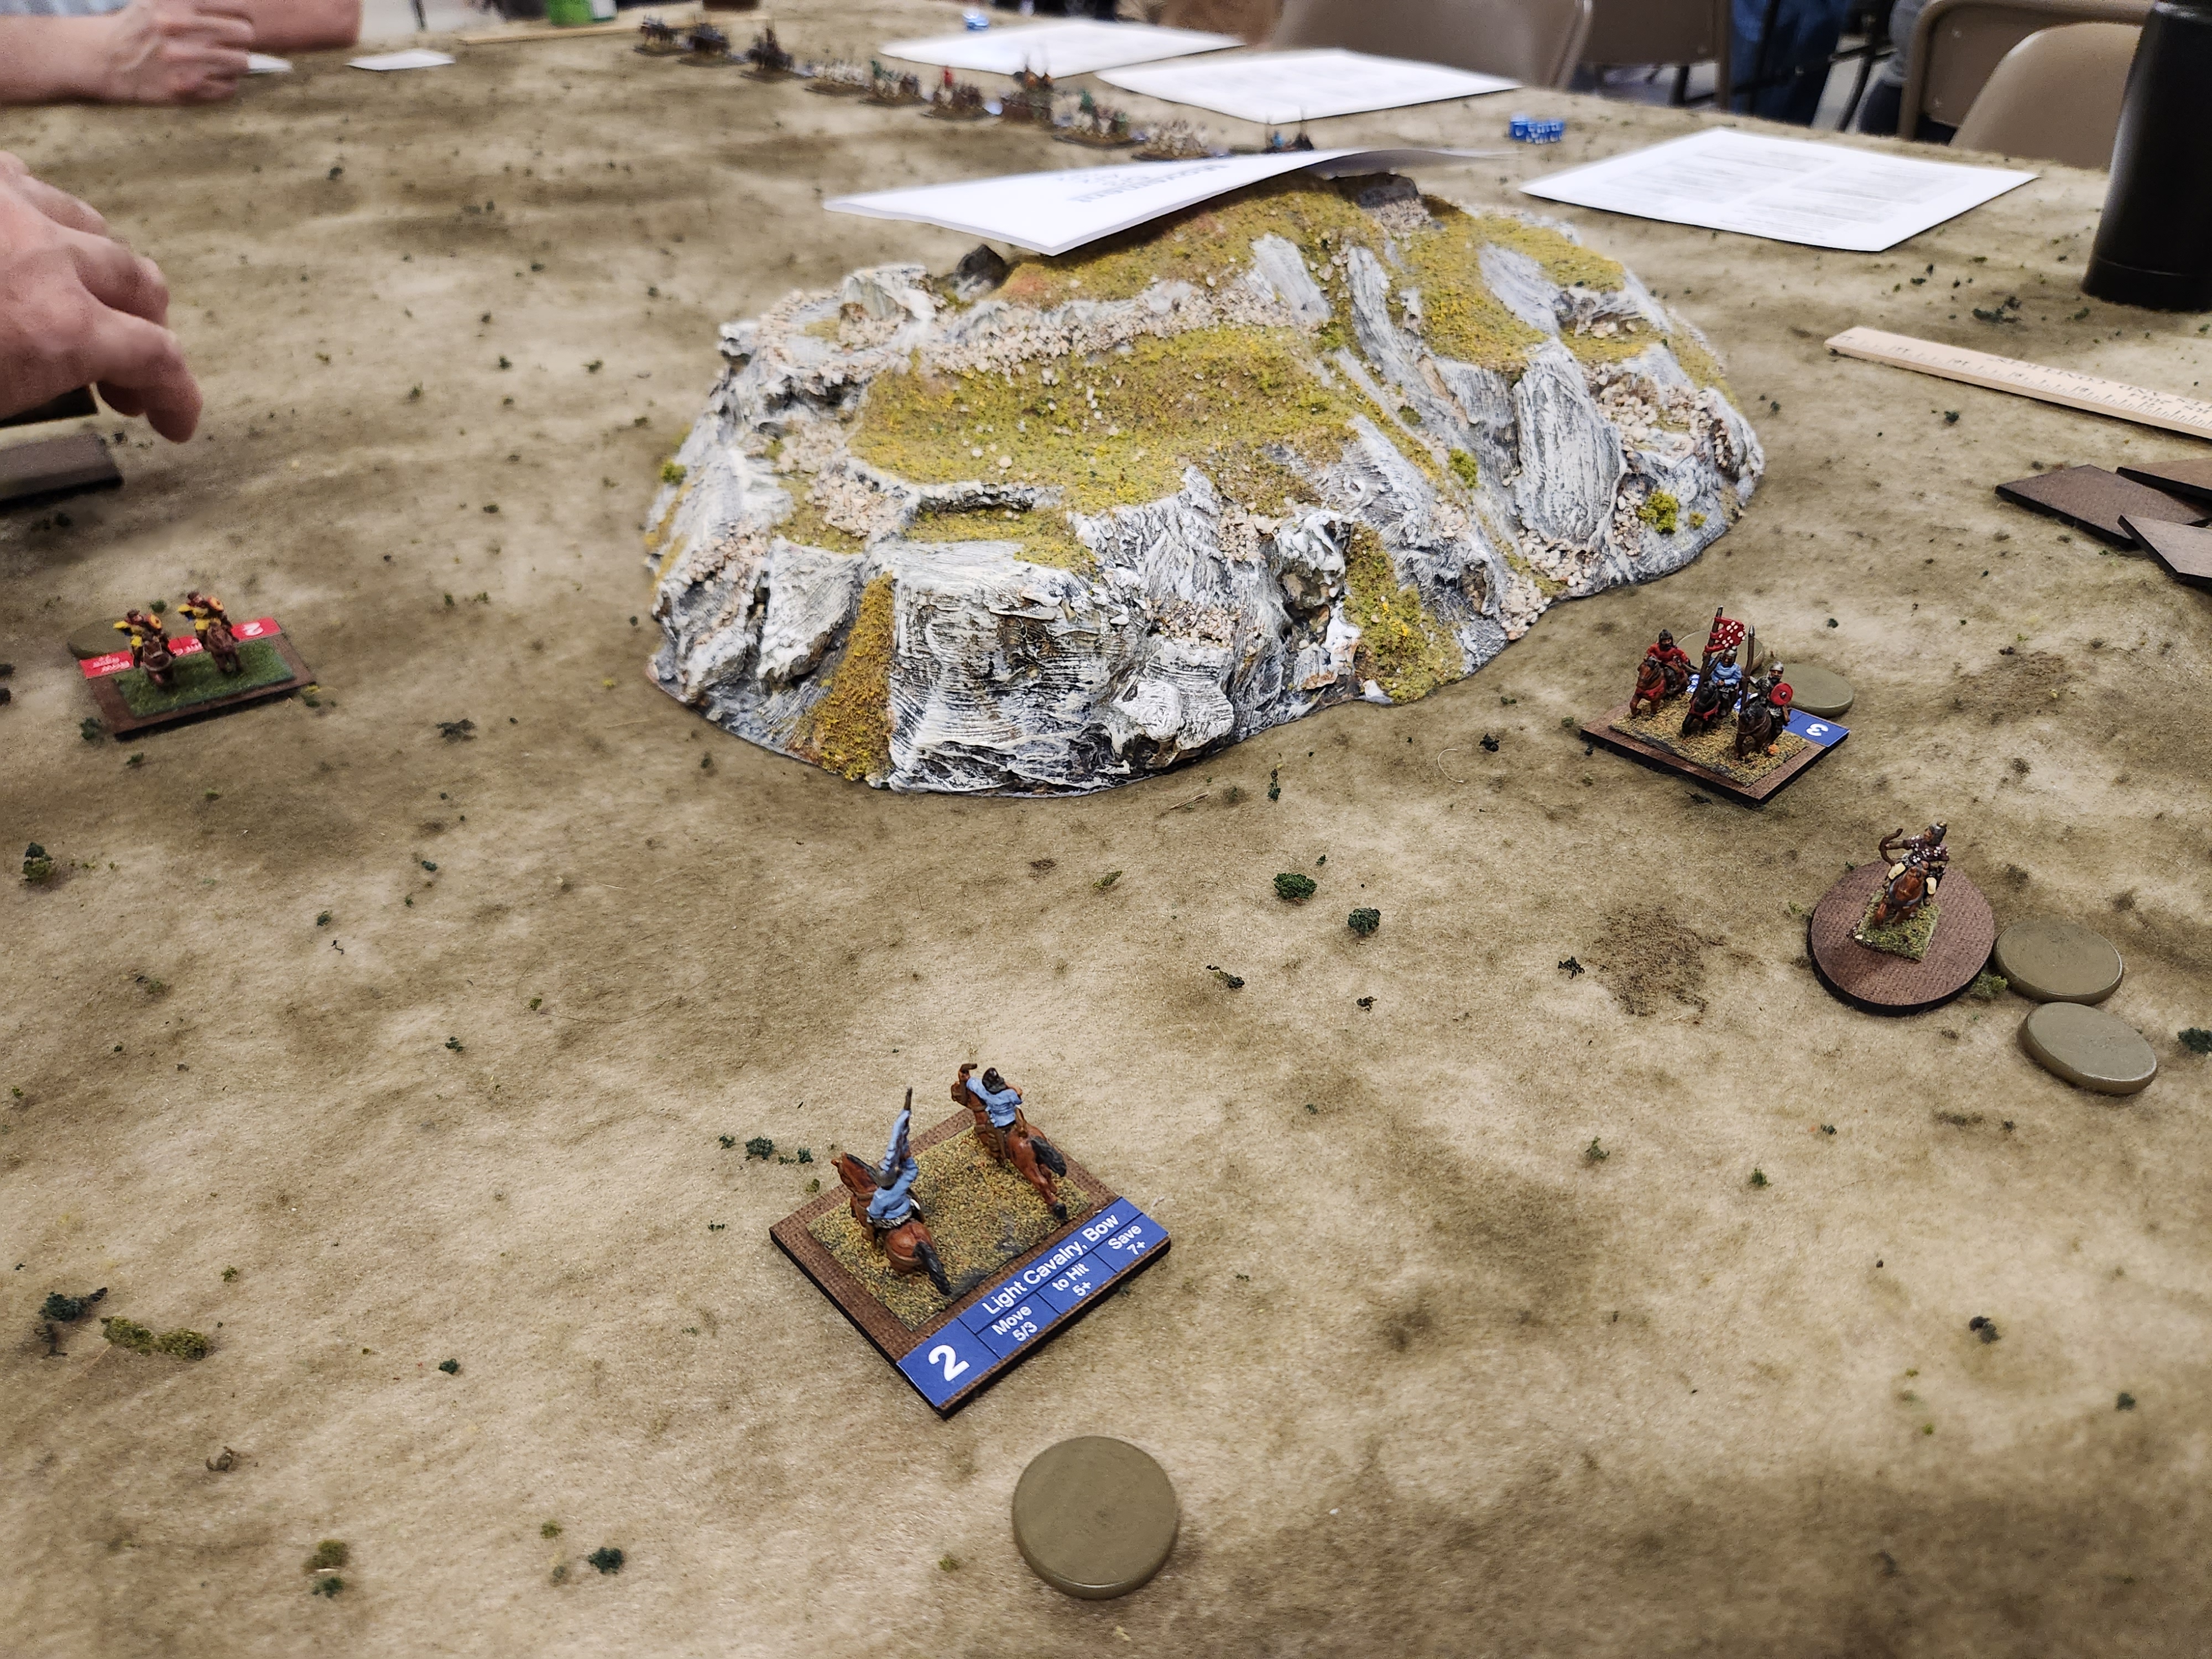
The game started with the reveal of a Sassanid cavalry ambush, hidden behind the rise dominating one side of the battlefield. 

I should talk about the rules a bit. Turns are split into actions determined by random card draws between a Red side and a Blue side. Each card has an Action (Move, Shoot, Charge, Free) and a couple End Turn cards. Units alternate performing that action between sides. The card's corresponding color has initiative for the Action. For example, a Red Charge card will allow the Red side to make the first charge.

Units also have action pips (1 or 2), which they can spend to take the action on the card. Once a unit is out of pips, they can no longer take actions.

So a unit could potentially charge twice in a turn, or move twice, or shoot twice. But it's random, and spending your pips early in a turn can leave you without any chance to exploit a situation later in the turn. But those two End of Turn cards can be drawn at any time, leaving your saved pips wasted. 


Will took command of the ambush and the Sassanid left, facing off against Norman. 


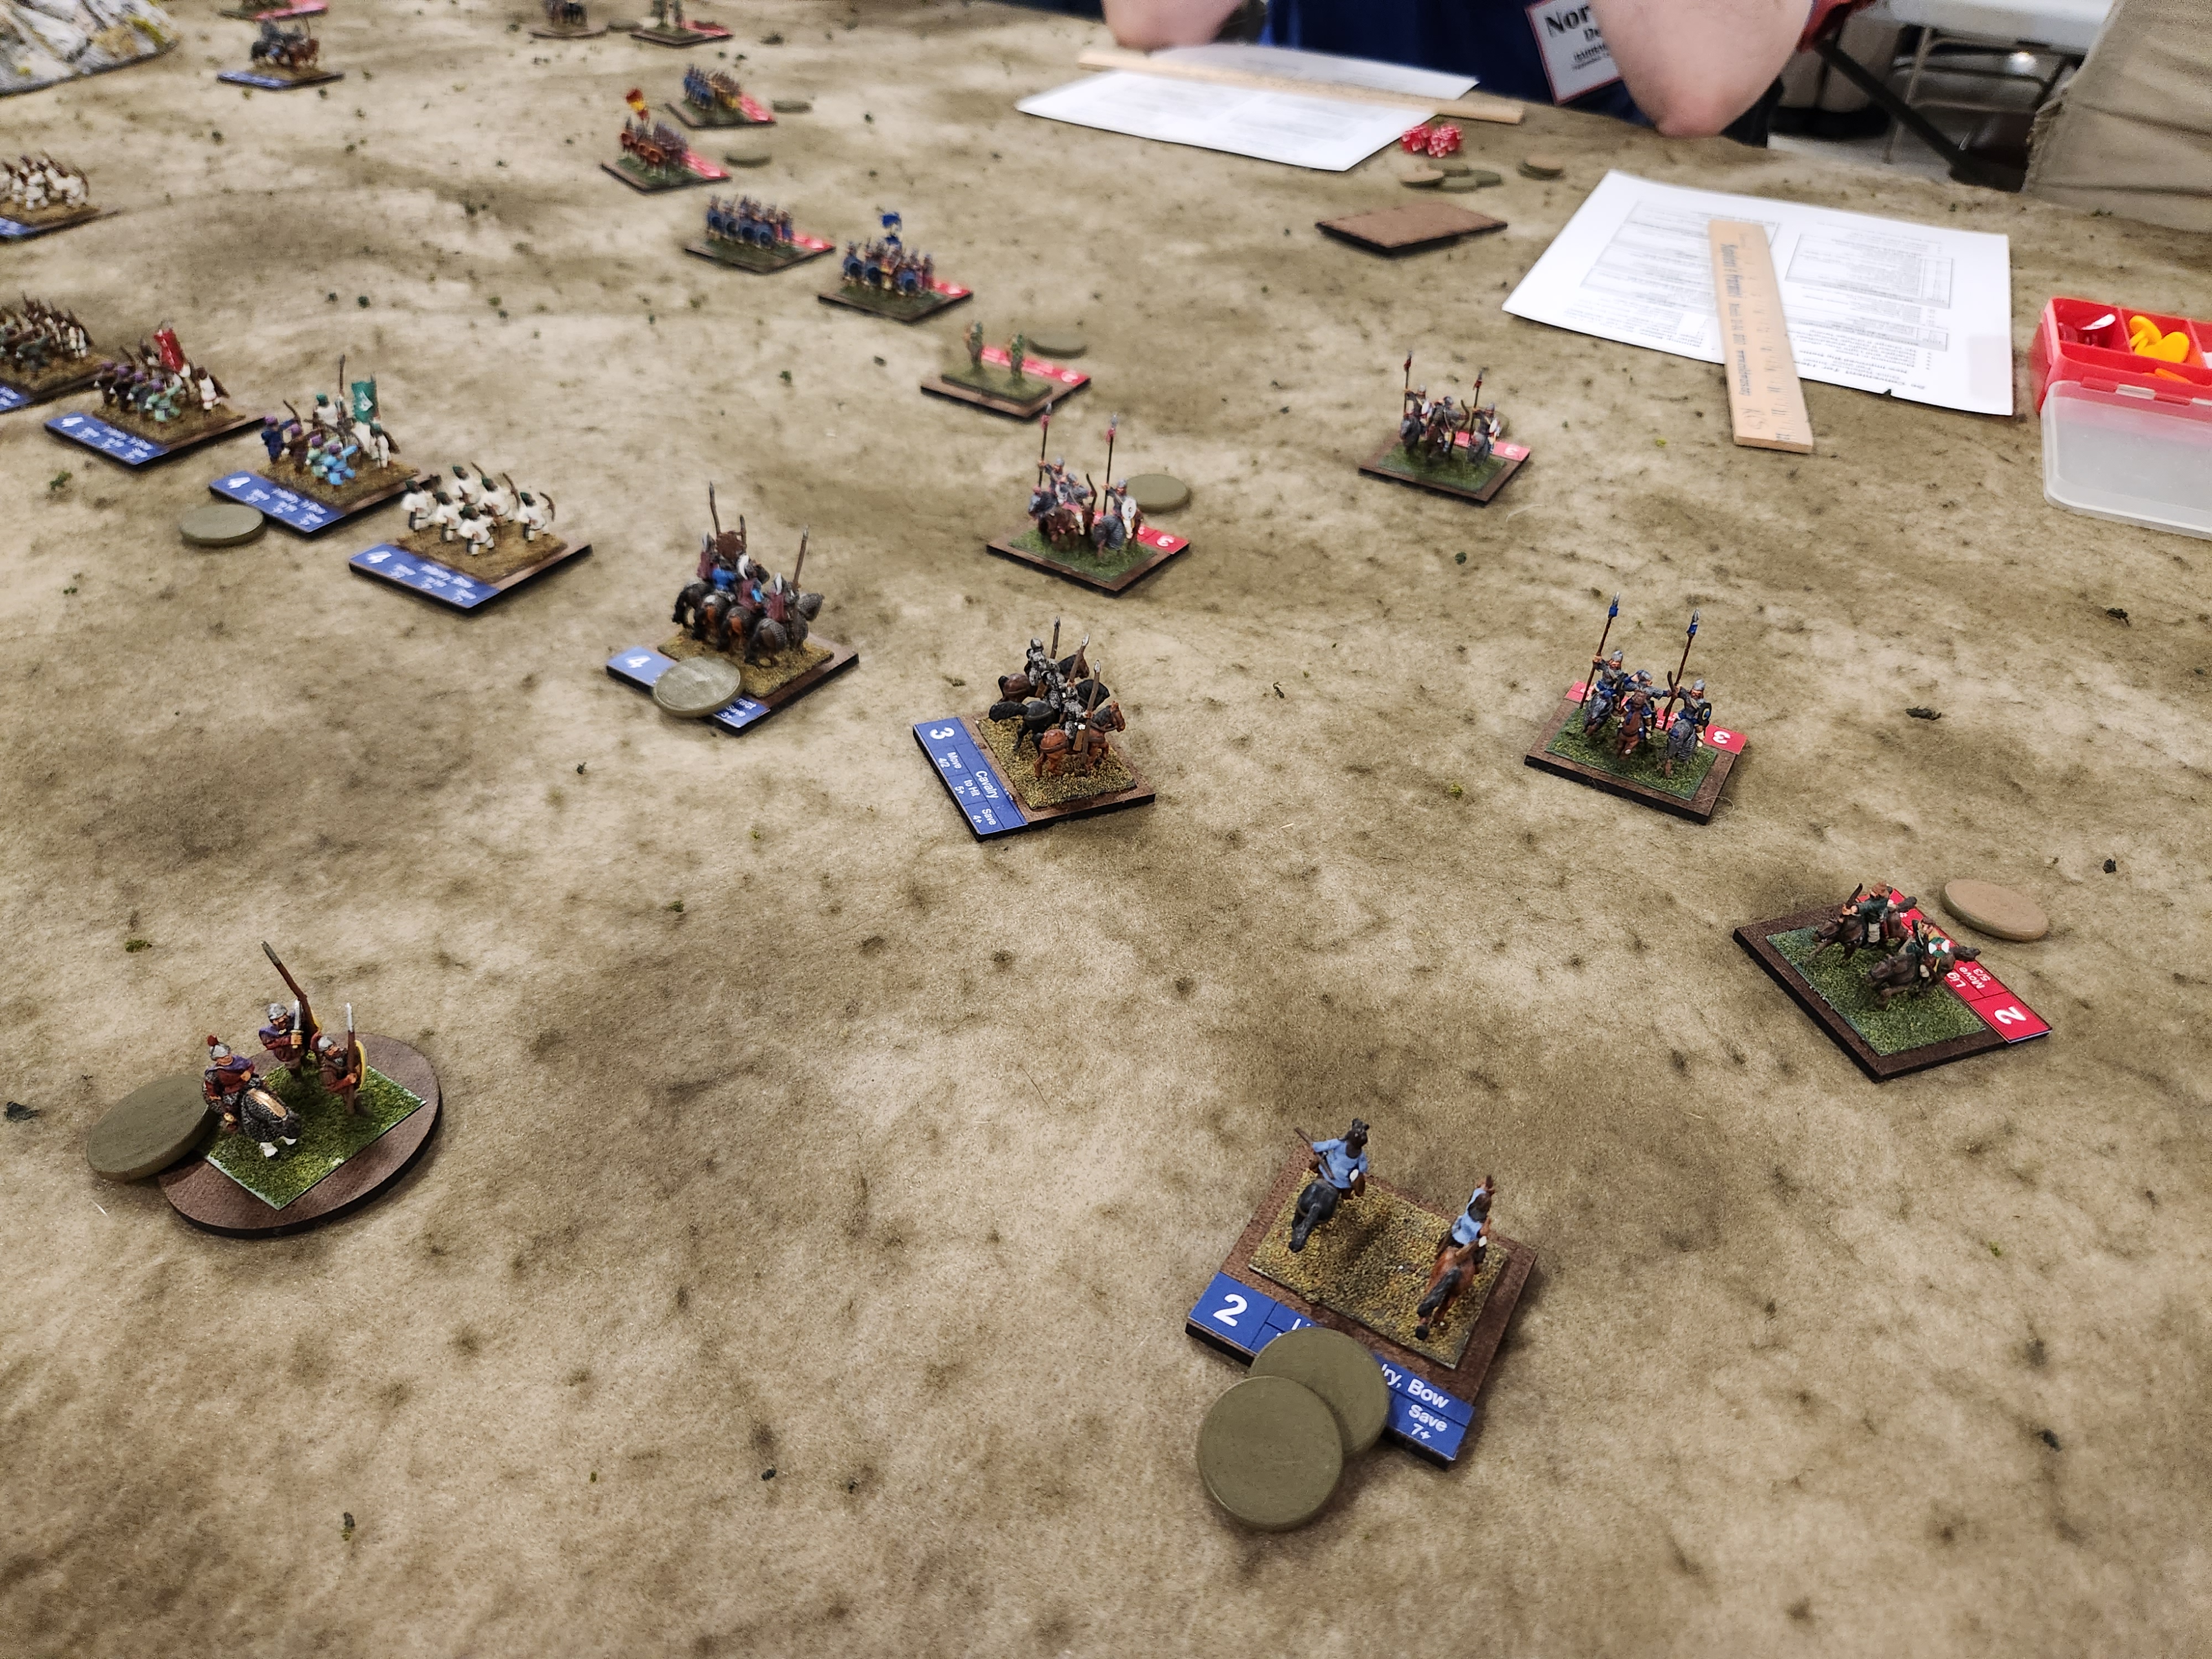
On the other side of the battlefield, Rob and I performed a cavalry ballet. 

And the footslogging infantry worked their way towards combat. 


The Sassanids had a unit of Cataphracts, which were the kings of the battlefield. But my poor luck meant they weren't all that effective. However, my light cavalry kept two of Rob's cavalry units occupied. 

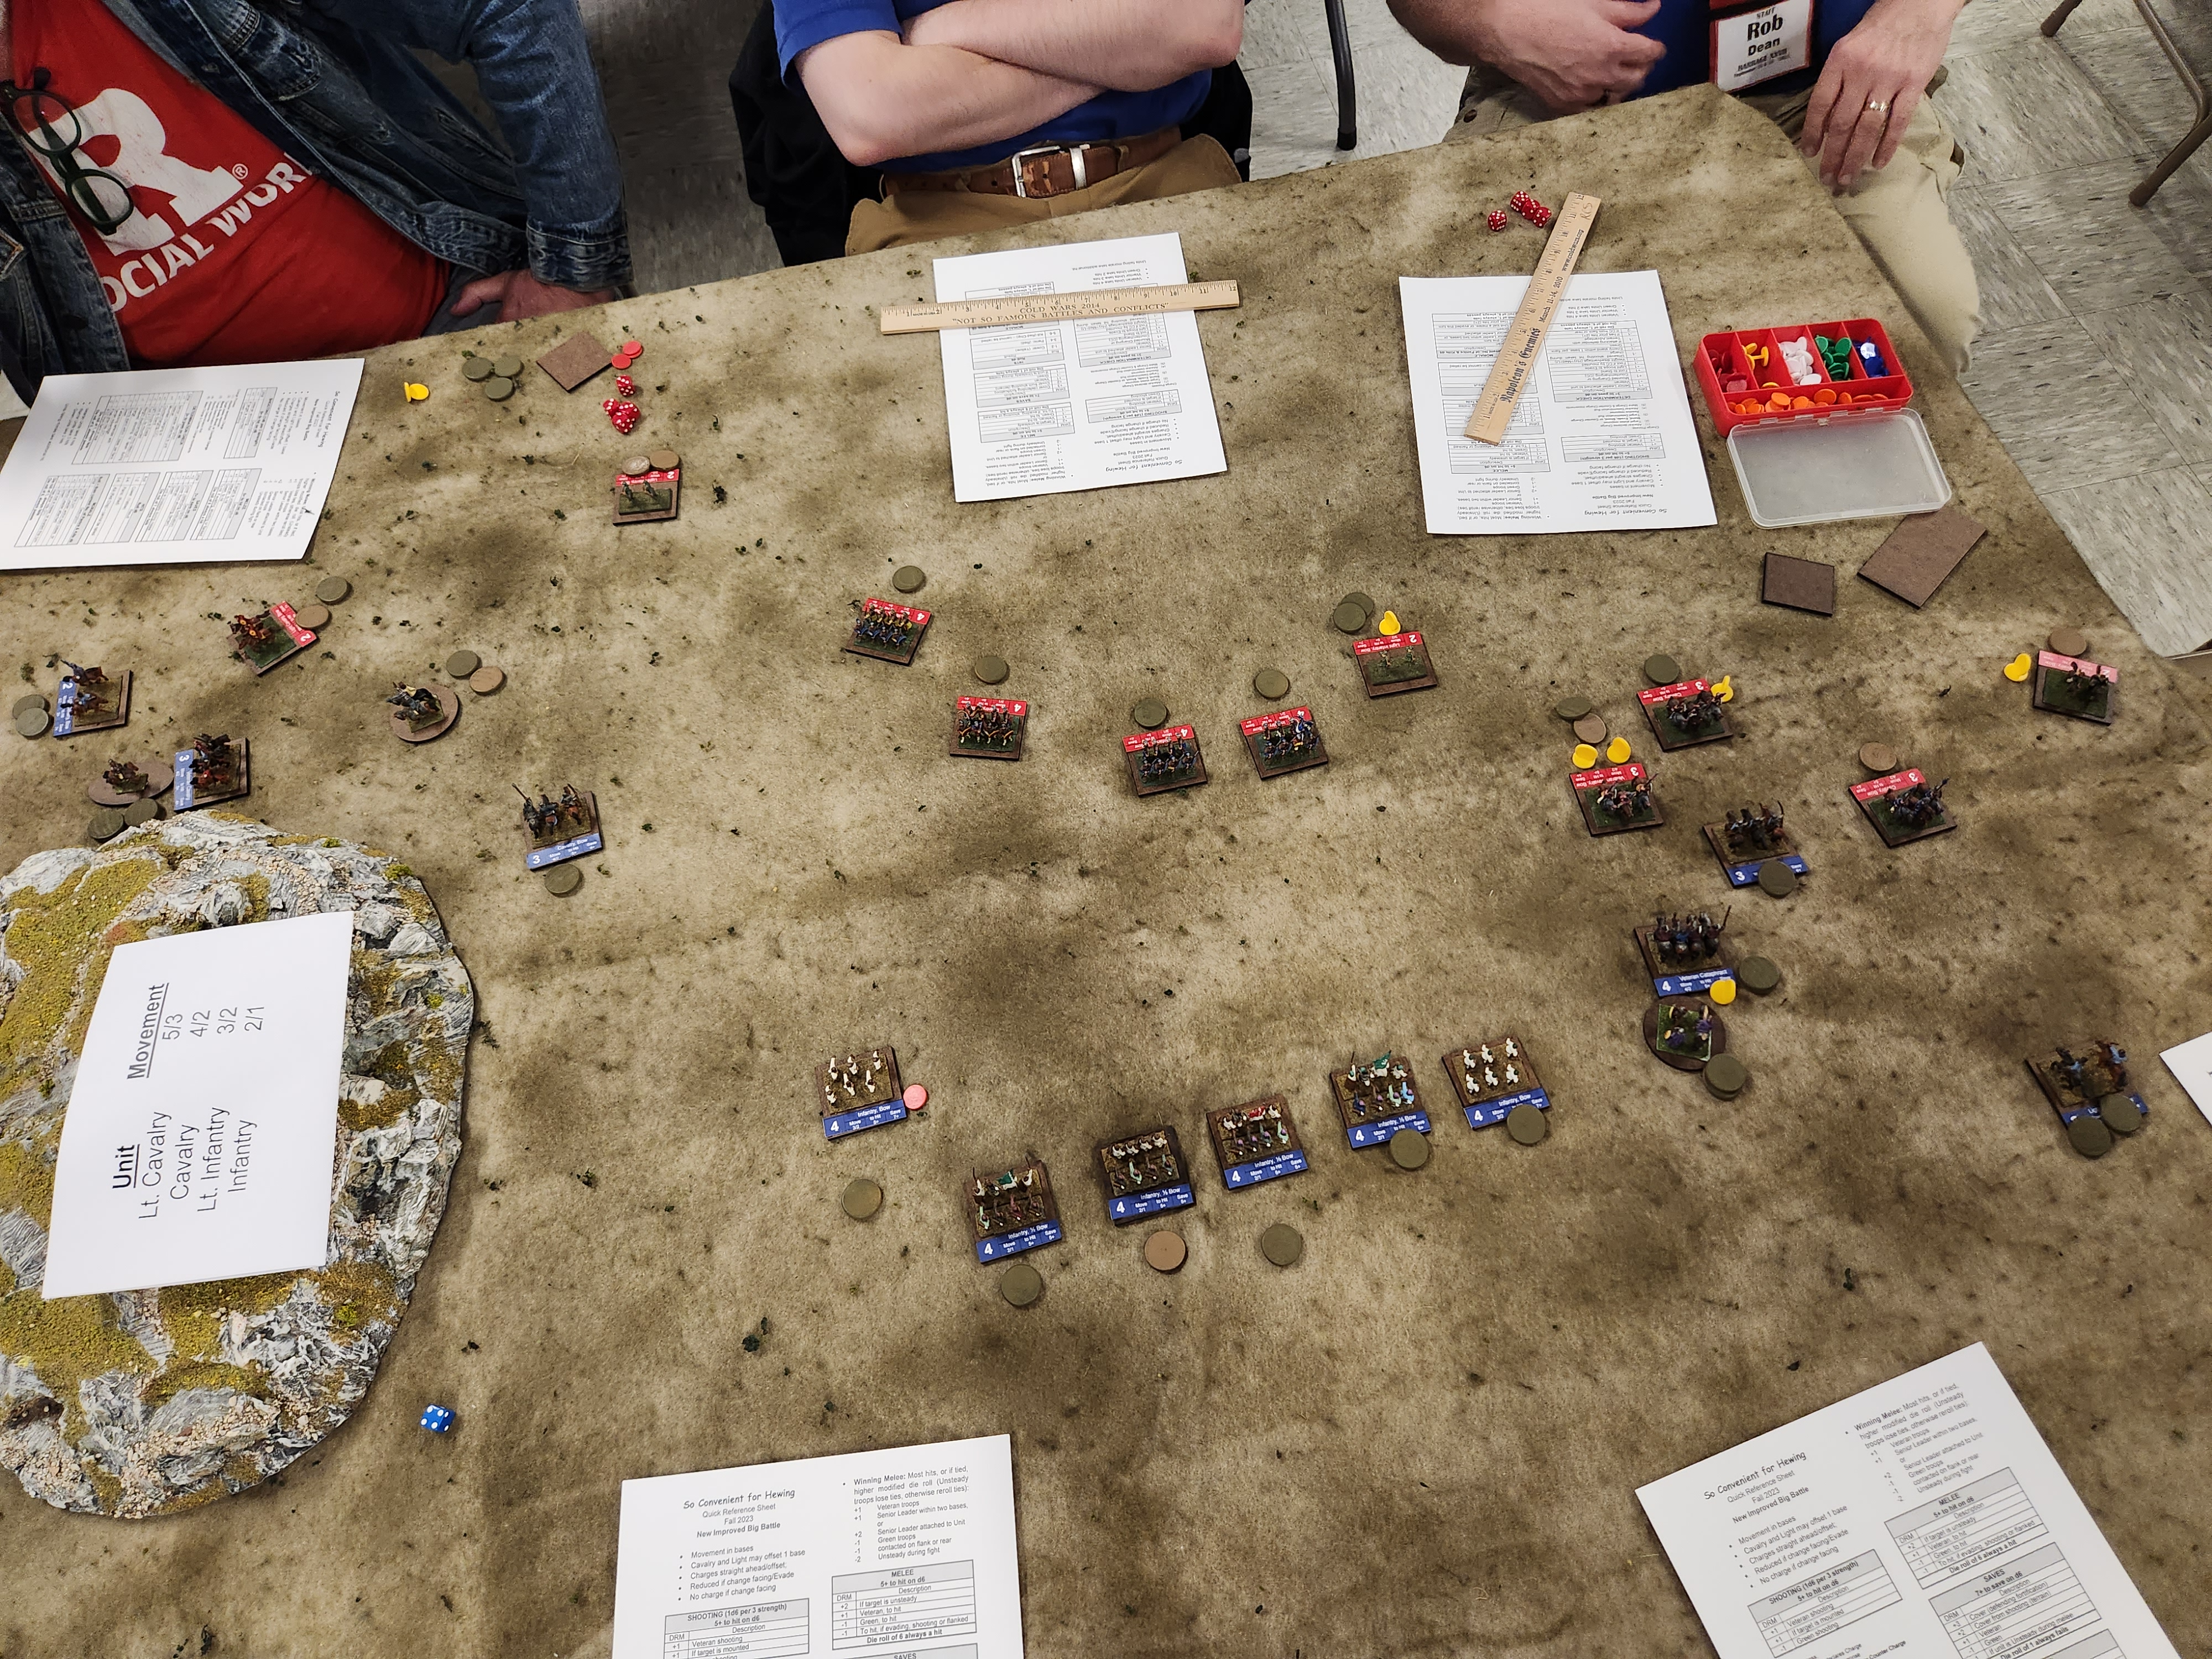
After a few turns, the Sassanid ambush had succeeded, leaving the Byzantine's flank wide open. 

It was also here that we discovered the rules' "end of game" mechanic; for every regular (non-light) unit lost, you compare that number to a d6 rolled at the end of each turn. If you roll equal to or under that number, your army routs!


While the light cavalry occupied each other's attention, Will pushed into the Byzantine flank. Will's infantry fell back, peppering the Sassanid cavalry with arrows. 


The cavalry battle on the Byzantine left wasn't as decisive. 

I should note that the Sassanids had one huge advantage in this game; a second general. Generals in these rules can use their pips to command other units and can join units for extra bonuses. With the right combination of cards, a general can get a unit of veteran cavalry to charge four times in one turn! 

With two generals commanding their cavalry, the Sassanids had a decent advantage in decisive activations. 


Of course, that didn't matter so much when I couldn't get my troops in order (i.e., not roll like crap). With my light cavalry chased off my flank, Robt was free to swing his own light cavalry into my exposed flank.


Which gave Rob the chance to charge into the flank of my Cataphracts and send them running!

Luckily the Cataphracts' heavy armor kept them from taking any permanent hits, but they were suddenly in front of the main Byzantine line, full of mixed melee/ranged infantry units that were plenty willing to take potshots at the Sassanid cavalry as they rode by in a blind panic. 


In his efforts to catch the Cataphracts, Rob did allow his line to become muddled.


Meanwhile, Norman had managed to rout another Byzantine unit. 

I also managed to rout a Byzantine unit (while losing one of my own), and Norman bagged another.

It was there that the Byzantines finally rolled low enough for their army to break, and the game ended.

The rules received pretty positive praise from the players. Jessee did a great job adapting a set of skirmish rules to something that has the feel of a larger battle, and there are plenty of decisions to be made during the game. Our only concerns were how strong generals were (having both extra activations and bonuses to melee and leadership) and the somewhat arbitrary roll for ending a game. 

I would recommend anyone looking for a fun set of fairly simple rules that don't need a large investment to get into to check these out once the full version has been released. 

Wednesday, August 23, 2023

All Systems Greene - Washington's Wars AAR

I not only attended this month's SJGA game, but also helped to run it. Major kudos to Ryan who not only also helped to run the game but painted 120+ miniatures in a short period of time, and to Sam for providing his collection for us to use as well. 


Sam had requested earlier in the year that we run a game using the rules "Washington's Wars", which were published back in 1993 - two years after I was born. 

The rules have a few scenarios in the back, one of which was Guilford Courthouse. Sam's collection has both Tarleton's Legions and Washington's Cavalry, and Sam had an ancestor in Washington's unit. So we decided to use that scenario for our game. 


The British players started at one end of the table, consisting of:

General Cornwallis
General O'Hara
Colonel Webster
von Bose Regiment
71st Foot
23rd Foot
33rd Foot
1st Battalion Guards
2nd Battalion Guards
Grenadiers
Light Infantry
Legion Cavalry
Jagers
Artillery (2 Light guns)

Their goal was to rout or capture three of the four Continental regiments. 


The American were deployed in three lines, spread out along the table length:

First Line
General Greene
1st North Carolina Militia
2nd North Carolina Militia
North Carolina Riflemen
Virginia Riflemen
Artillery (1 Light gun)
Second Line
1st Virginia State Militia
2nd Virginia State Militia
Third Line
1st Maryland Continentals
5th Maryland Continentals
4th Virginia Continentals
5th Virginia Continentals
Washington's Cavalry
Artillery (1 Light Gun)

Their goal was to cause more casualties than they lost. They would need to have the four Continental units engage before being allowed to begin a general withdrawal. 


The British stepped off together, but their approach was stymied by the American riflemen. The large, 16-man Virginia rifles were especially dangerous, causing relatively massive casualties early on.

However, the rifle's poor morale meant that once the British were in musket range, they were very likely to run off, leaving their defensive positions behind the fence line.

The British did have better luck with their artillery, quickly knocking out the lone American gun. 


One of the rules changes we made (since the rules were designed for 15mm miniatures and we were playing in 28mm), was making the reserve movement double instead of one-and-a-half times a unit's movement. 

This allowed the Americans to bring up their reinforcements somewhat quickly. Sam was in charge of the Continentals and charged Robert's Legion cavalry. The Legion had the better time of the fight and forced the American cavalry back.

Unfortunately, Robert then followed up with a countercharge. He did force Washington's cavalry to retreat, but that led him into range of a point-blank reaction fire from the accompanying Continental infantry. The bonuses for short-range and First Fire was enough to wipe out Tarleton's unit. 


On the British right, the Americans were in full retreat, hurriedly trying to reorganize their lines before the British could get to close. 

British long-range fire peppered the American lines, causing casualties but not forcing them back. 


With both cavalry units rendered ineffective through casualties, the Prussians and Continentals faced off, exchanging volleys. 


With the Continentals double-timing, and some well-timed volleys from the Americans, the British advance was checked. This gave the Americans enough time to shore up their lines.


Further combat on the American left saw losses on both sides, with the British continuing to advance. On their right, the British had halted their advance. 

Unfortunately, we ran out of time. But the Americans had battered the British, with the Redcoats losing twice as many casualties. With the Continental units almost untouched, the Americans could put a feather in their cap and ride off calling it macaroni. 

Washington's Wars, for being a dinosaur compared to other wargaming rules, turned out relatively easy to play. We did have to talk out some of the rules (like some sections on the reference sheet missing in the rulebook, or lacking clarification), but it wasn't a bad time. And I'm happy that we managed to get 7-8 people playing. 

Between Ryan's and Sam's collections, the club should be able to put this game on again if they want to tweak any of the changes to the rules we used. 

Wednesday, August 2, 2023

Painting Update - Napoleonics

The move from New Jersey to Maryland has been a major disruption for my hobby time, thus the lack of posts to the blog.

The biggest casualty has been my painting motivation. I'm lucky that the new place has enough room that I can keep my painting table set up, but I've found it difficult to find the time or drive to pick up the paint brushes. I've been trying to ramp myself back up, by taking about 15 minutes a day to get some work done. 

This also means that I'm way, way behind on my Napoleonic project that I talked about at the beginning of the year. I still haven't finished the Russians for Weissenfels, let alone the French (which still need to be ordered, let alone assemble and paint). 

Attentive readers may point out that I also failed the other objective of the Napoleonic campaign, which was to refrain from starting any new projects. Ah, well. 

Update: Since writing this post (and letting it sit in my drafts for weeks), I've finally managed to start painting again. The slump lasted a couple months, but I think I've gotten back into the groove of painting. The biggest hurdle was having all of the Russian infantry out on my desk. I've since placed them out of sight, only bringing out a unit's worth of infantry at a time. 


Just prior to the move I did finish the last unit of Russian cavalry for Weissenfels, the Soum Hussars. 


And the unit that I managed to finish recently was a battalion of the Schusselburg regiment. 

Wednesday, June 28, 2023

Feel the Heat - Downsync AAR

Having moved from New Jersey to Maryland, I haven't had many chances to play (or even paint all that much, honestly). It's tough to leave behind reliable gaming groups and friends, and then try to build all that back up again. 

I've been somewhat lucky, however, since there's a local game store that looks like it has a pretty regular crowd of gamers, and with diverse interests as well (no Games Workshop monoculture!). 

While I was scoping out the gaming scene, I met Carl, who was helping to run a couple games of his own rules, called Downsync, and still being worked on. As he described them, I was instantly intrigued; 15mm scifi skirmish set in a world heavily affected by climate change with some fascinating mechanics. He was kind enough to run me through a small demo game (with Joe as my opponent) a couple weeks later when I had some free time.


Blinds (or "pings", as they're referred to in the rules) feature heavily in gameplay. Your force starts out entirely as pings, which act both as stripped-down units and deployment zones. They come in three sizes (small, medium, and large), and they don't have assigned units as they maneuver across the battlefield. The only restriction is that you must deploy the correct sized unit to its corresponding ping; small to small, medium to medium, large to large. 


The game uses a modified set of alternating activations. The active player makes a "taskforce" from any number of units on the table and performs actions with them. The non-active player can chose units to react. Players alternate back and forth, each being the active player until every unit has activated or reacted. 

This creates an environment where players need to consider what they're activating and when. Units are designed to create combos with each other, ramping up their effectiveness against enemy units.


For example, take the faction I was playing during this game, the Republic of Terra. I had a combination taskforce of a Vector Squad, a Courier APC, and a Crusader tank. The Vector squad has anti-tank weaponry that makes Countermeasures (CM) (a unit's ability to defend itself and a series of saving throws) roll on a 4+ instead of a 3+. When an enemy runs out of CM, it's extremely vulnerable, which is where the Crusader comes in with its +1 to hit against enemies without any CM (and in a 2d6 spread, that can make a lot of difference). And finally, both the Crusader and the Courier can act as cover for the Vector Squad, allowing them to use their CM as the infantry lacks any native CM. 

Alternatively, look at the Harbinger recon vehicle and the Samson heavy tank. The Harbinger's main gun can Stun enemy units, and the Samson gets a to-hit bonus against stunned enemies. 


The Vector/Courier/Crusader taskforce ended up working very well for me, allowing me to knock out multiple enemy tanks. 


Though Joe's Coalition forces had some tricks of their own. His Phantom support vehicle has the ability to tag enemy units, decreasing their defenses, while his Virago tank gets an additional +1 to hit enemy units at short range. Working together gave him a +4 to hit my Courier, which quickly blew up. 

We ended up trading more units, with Joe's spider-bot infantry taking out my own infantry unit. Still, the Republic was left standing when the dust cleared. 

I enjoyed the game thoroughly enough that I walked out of the store with a Republic starter set, which I plan to paint up soon. Expect to see more Downsync on the blog, and check out the website!

Wednesday, June 14, 2023

Painting Update - WWII

 I've been pretty busy recently (having moved from New Jersey to Maryland!), so I haven't had many chances to game. But I have been painting!

I finished some extra German infantry for my Early War platoon. The SMG-armed troops can be swapped out for rifle-armed squad leaders, which happened between 1939 and 1940. The extra rifle-armed troops can be used to bulk up weapon teams, since Bolt Action uses 3-strong teams and Chain of Command uses 5-strong teams. 

I also added some more tanks to the collection. Previously, the Germans could only call upon a trio of 38(t)s. Instead of captured Czechoslovakian armor, I wanted to be able to field "proper" German tanks, starting with this resin Panzer I from Blitzkrieg Miniatures. 

Next, a 3-D printed Panzer II from Blitzkrieg Miniatures.

And finally a Panzer III, 3d printed from a vendor at a convention whose name I can't recall. But they did a great job, and I'll alter this post if I can find out who made it.