Wednesday, April 9, 2025

Brittany's Spears - Right Cruel and Fell AAR

Another weekend gathering at Kelly's!


This time we were playing another of Rocky's rules; "Right Cruel and Fell", for fighting the Hundred Years War.

This was a bash-up set early in the Hundred Years War, with the French and British providing backing to a civil war brewing in Brittany. Historically, this was a proxy war between the two larger powers, but Rocky's scenario was set in a version where both sides had sent proper armies to back their candidate.

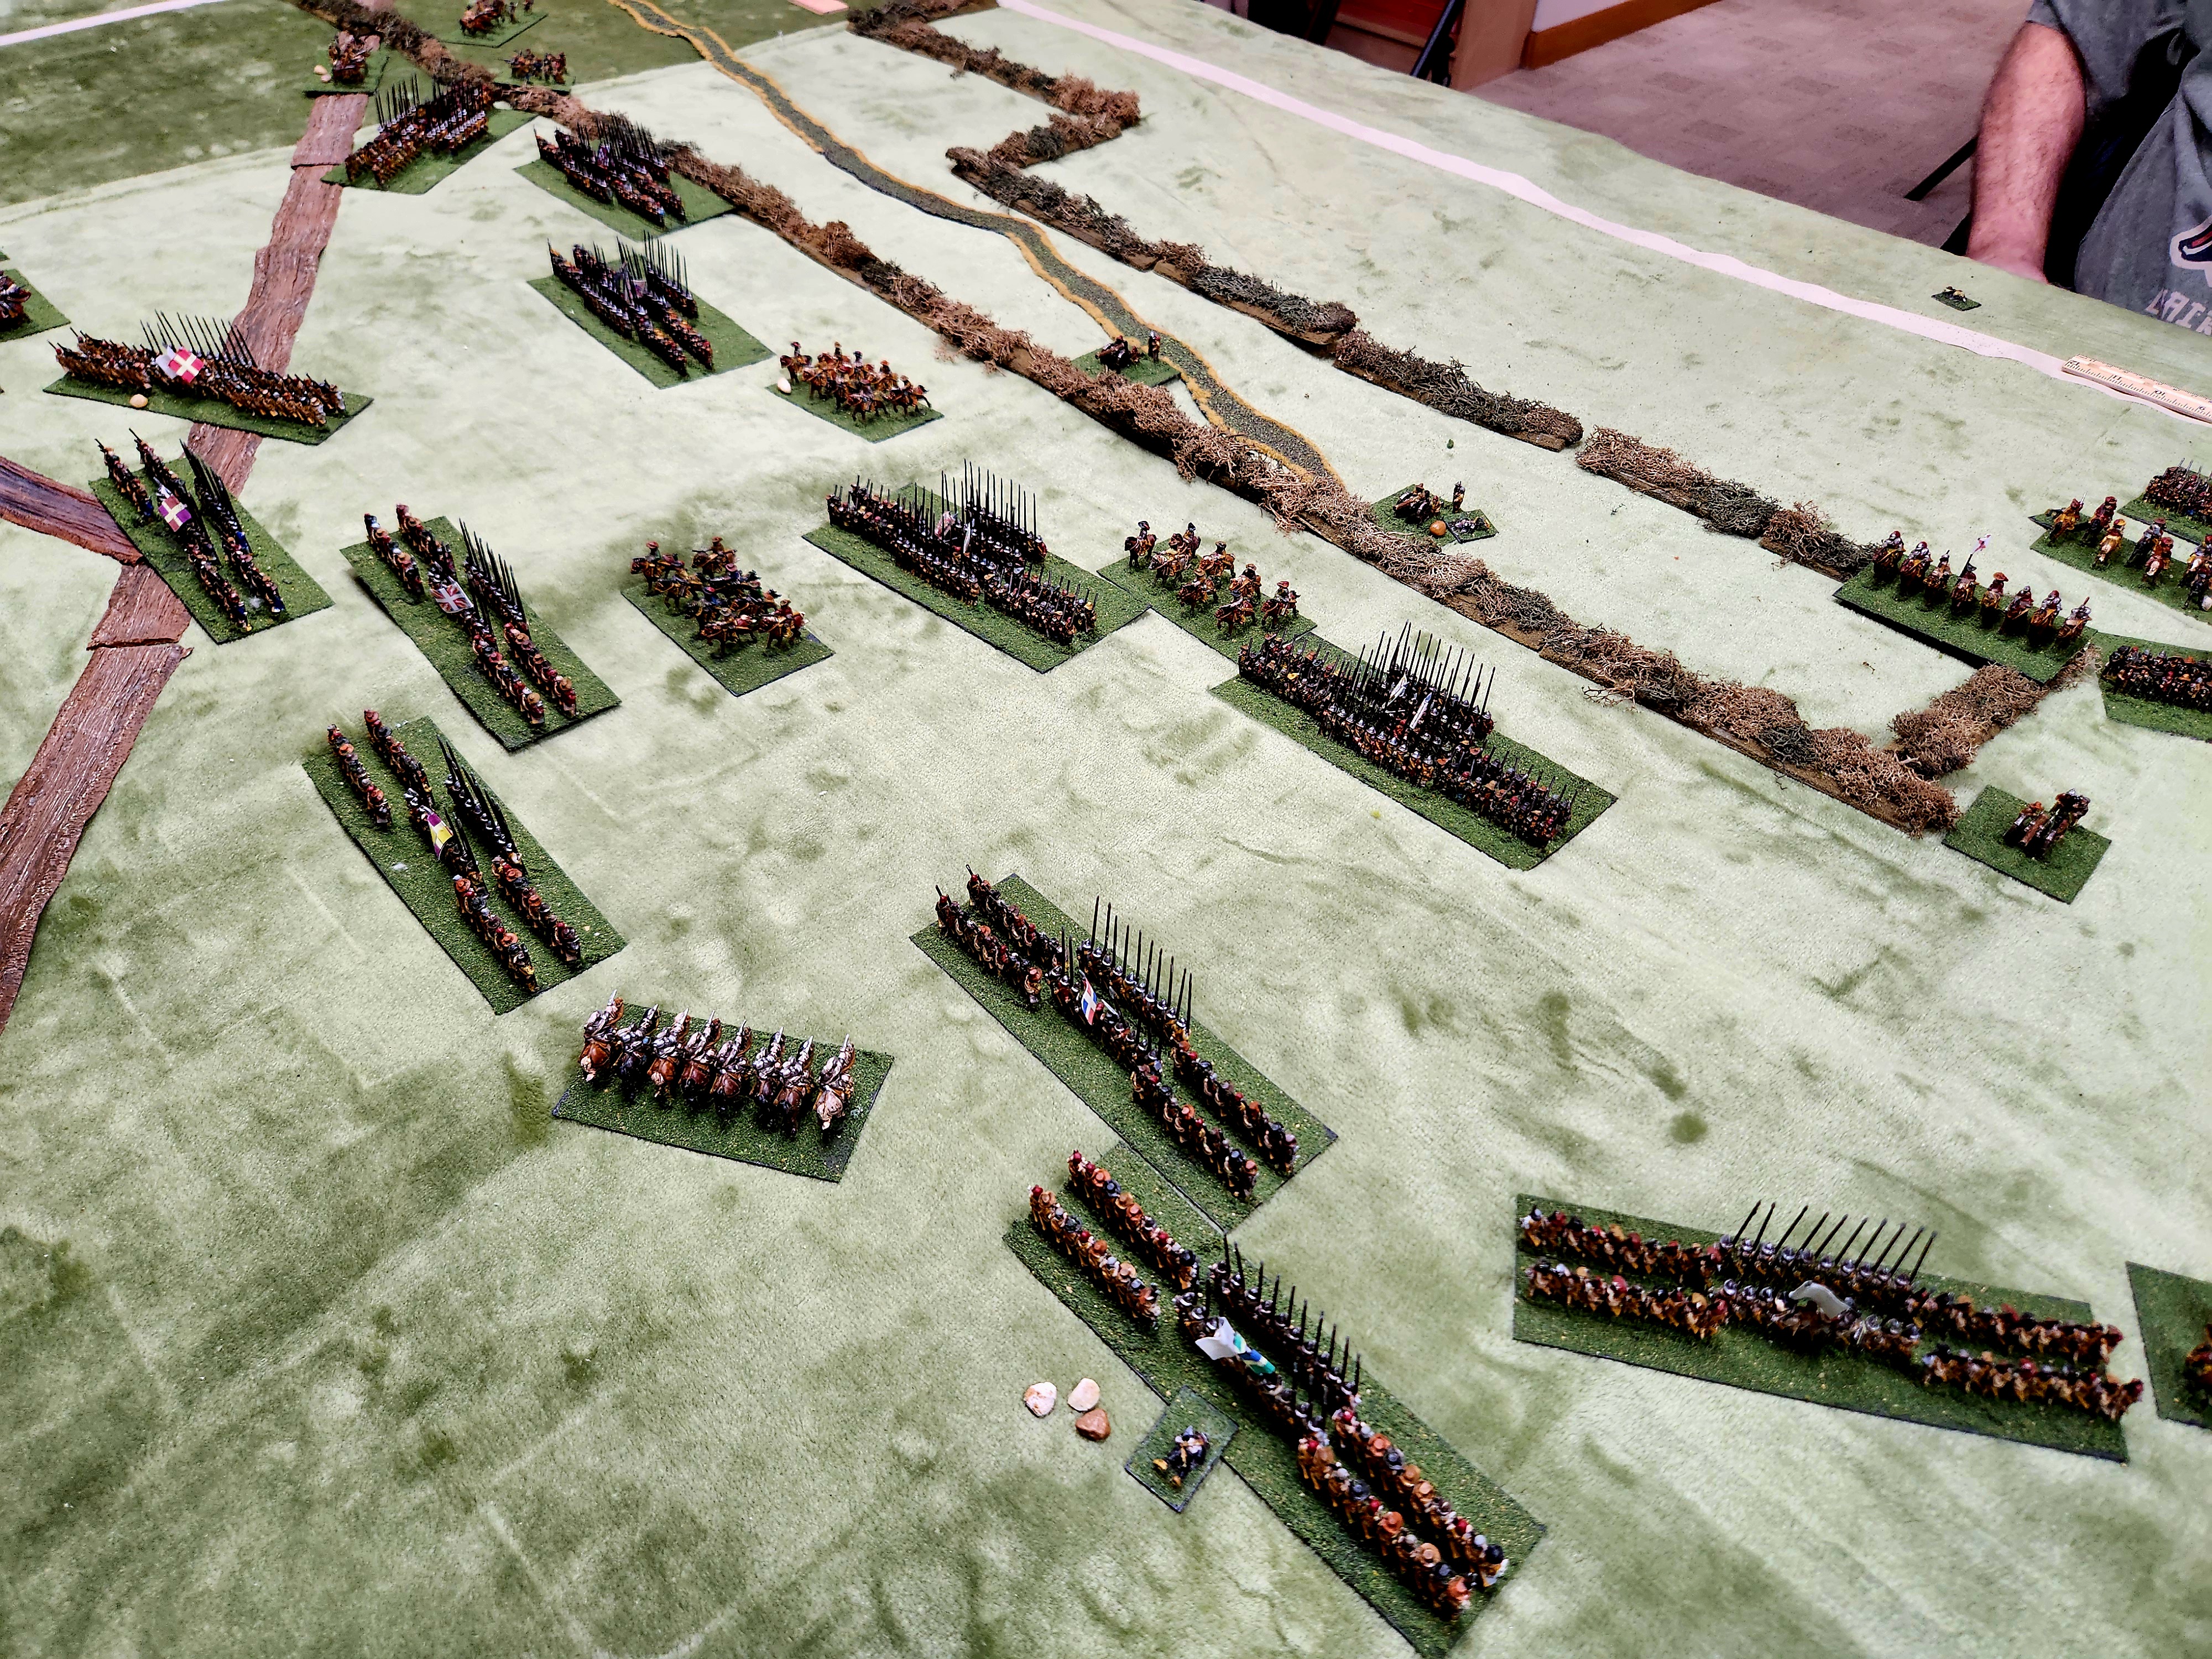
The scenery was randomly set up by Kelly, commanding the French, and I, commanding the British (Kevin and Scott would join the French and English, respectively, early during the fighting). Two fordable streams split the battlefield, which was centered upon a trio of small villages. Fields, hills, and forests were scattered around the table. 

The French and their allies consisted mostly of mounted men-at-arms with supporting spearmen, crossbowmen, and peasants armed with sharpened sticks. The English brought their longbows and men-at-arms, while their Breton allies had some men-at-arms, spearmen, and militia.

Now, a decent English commander would have looked at the table, seen how the terrain placement would likely lead to the French cavalry funneling into the center through the villages, and deployed appropriately. I, as it turned out, was not a decent English commander, and so set up two independent commands with an incredibly weak center.


As an example, look at that incredibly open road leading right to the English camp! 

But maybe I would get lucky and the French cavalry would trip over some rabbit holes. 


As the Englishmen busied themselves in a pair of fields, the rest of the three commands approached each other with skirmishing crossbowmen. 


Realizing that I hadn't done much to protect my vulnerable center from a tidal wave of the cream of French nobility, a lone unit of English men-at-arms set themselves in the way with a barricade of wagons. 


Since Scott rolled multiple 6s for his battle's command checks, his troops that weren't in defensive positions were forced to keep advancing towards the enemy. 


However, the French knights were happy to ignore the villages they weren't allowed to enter and rolled on by. 


The English longbowmen were the most threat to the French cavalry, but this had an unintended consequence. As the French were hit, they slid back and away from the threat; placing them closing to Scott's Bretons.


Kelly's first wave of knights began to charge the enemy units while a second wave formed up.

In Right Cruel and Fell, French men-at-arms are forced to advance towards any enemy units with 3 squares. As the heavily armed knights can only move 2 squares per cycle, it's possible to bait them forward to attack unsupported.


Now, the way the rules work, English dismounted men-at-arms should be able to see off their mounted French counterparts, as they're more numerous per unit.


However, if you're rolling like I did during the game, then your Englishmen are going to be as effective as a can-opener made of cardboard and white glue. 

Kelly's knights attacked on a broad front, pushing back the English center. The longbowmen in the field were desperately loosing arrows to keep the French back. 


Zooming out a bit more, you can see Kevin's attack finally crossing the stream and pressing the rest of the English force. 


However, what sealed the fate of this battle was Kelly's breaking of the center, routing the only English men-at-arms defending their camp. 


Looting a camp is worth 10 loss points. The English would begin to wave at 26 loss points, and rout at 31.


It seemed as though the French cavalry were everywhere, breaking through the English line at multiple points.

With multiple losses of valuable men-at-arms and longbowmen, the English were forced from the field, and France's candidate for the duchy of Brittany was likely to secure his seat. 

This defeat was on me from the outset. I likely should have gambled more with the defensive terrain to give the English a better position. While I wasn't wrong in acting defensively, Rocky's advice was that a much more condensed battleline with flanks anchored on defensive terrain would have had a better chance against the French. 

However, I did enjoy these rules, and I would forward to trying them again. There are also a trio of supplements that expand the rules to other time periods: the War of the Roses, the Italian Wars, and the Great Teutonic War.

Wednesday, April 2, 2025

Return to Osma - General d'Armee AAR

This past weekend, Kelly hosted a game of General d'Armee (first edition) at his home.


We were refighting Osma, which I have played before with Ted and the others in the New Jersey group (using the second edition of the rules).

The scenario was the same as before; three French brigades attempting to hold back a combined force of four British and one Portuguese brigades. The British had 10 turns to break the French.

Kelly GM'd, Larry and I commanded the British, and Scott and Jeff commanded the French.  


The game started with the British pushing forward as quickly as possible, with the Portuguese using a Forward! order to move up their flank.

The French elected to have one brigade defend the wood-covered hill that extended across half of the table, while the other brigade was split between defending a line of hedges and the small town. 


On the other British flank the King's German Legion light brigade moved in skirmish lines towards the French brigade that was quickly taking position on the hilltop. 


The French garrison, on seeing the waves of British uniforms approaching, realized it was likely better to move up from their position to halt the enemy advance. 


Both sides exchanged skirmish fire as battalions moved into position. 


In an incredible feat of dice-rolling, Larry managed to secure a Retire from an opposing French brigade through the Destiny table! This gave the British a chance on their right flank to keep advancing. 


Meanwhile, I was making a hash of things on the left. A failed infantry assault saw the KGL light brigade pushed back and out of firing position, while a battalion of KGL line infantry was being battered by two French battalions. 


Unfortunately, the Portuguese brigade hesitated, giving their French opponents time to recover and shake back out into formation. The third French brigade advanced up the center. 


The battle for the hill continued. The KGL cleared the French skirmishers, but the formed enemy battalions held strong. 


The British center advanced towards a strong French presence. 


And the Portuguese were having trouble following up on their earlier success, as they exchanged fire with French skirmishers. 


While the British had gained an extra two turns from the Retire result the French had rolled earlier, the scenario wasn't looking good for them overall. The French still held the hill, keeping two British brigades checked. And none of the French brigades were likely to end up Faltering without some very lucky dice. 


And I definitely didn't have that luck! My hope of a successful infantry assault from the KGL line brigade went up in smoke, despite attacking a pair of French battalions that had lost fire discipline. 

The British decided to call off the attack at the top of turn 12, as there wasn't a likely avenue to cause another French Retire or Sauve Qui Peut result. 

My impression of this scenario from the last time I played it holds; this is a tough scenario to get a historical result with. Though I've seen other online reports with the British succeeding. I wonder what they're doing differently? I may have had more success had I been more aggressive with the KGL light brigade and fed them Skirmisher taskings for the game. They can really throw out hits, especially against formed battalions. 

Maybe we'll return to Spain at some point and try it again. 

Wednesday, March 19, 2025

Terci-oh No! - Tercios AAR

Last weekend Rocky ran another game of Tercios with his modifications.


The scenario saw French and Spanish forces once again clashing in the Spanish Netherlands, during the 1640s. 

The Spanish were largely deployed in a depression with a stream running through it, and were commanded by Kelly and Scott. The French had a more open deployment between a town and a hill, commanded by myself and Rocky. 


The last time I played, the French largely stood back and waited for the Spanish to advance into their small arms range. For this game, I played more aggressively and stepped off with my infantry battalions. 


I sent most of my cavalry on a flanking maneuver around the town that dominated the open flank, while I had my artillery concentrated on the hill. 


The Spanish sent their caballeros and musketeers to cover the advance of their tercios


The French battalions were split into two groups; one on the left that halted to engage with oncoming Spanish cavalry and infantry, and another on the right that continued to advance.


However, the right-wing group of battalions was thrown back by the Spanish tercios, and worryingly the large unit of Weimer German mercenaries was routed! These troops had generally performed well in previous games, and their early loss meant that a key unit on the French side was no longer available.


Meanwhile, at the battle around the town, while my musketeers had scattered the Spanish skirmishers the routed infantry was replaced by a full tercio. This discouraged my own skirmishers from advancing.

You can see the French cavalry turning to potentially engage with the tercio, but I ultimately decided against it. Even charging into the infantry's flank likely wouldn't give my saber-armed cavalry a decent change of winning. 


The French reserve cavalry units, having bided their time on the left flank, charged out and routed a Spanish tercio while the general infantry scrum continued on. 


The French cavalry continued to maneuver on the far flank. The Spanish had diverted a tercio, supported by caballeros, to counter the French cavalry. 


The Spanish had a very lucky turn where they won the initiative and managed to remove a number of disorder markers from their infantry units. Had the French gone first, it was likely that their combined firepower would have shattered the Spanish infantry as Disorder markers in Tercios decreases a unit's ability to save against hits. 


Unfortunately, the French cavalry attack floundered in the face of the Spanish opposition. We've noticed that French saber-cavalry struggles to deal with Spanish caballeros in combat, even when the French cavalry managed to charge in unhindered by wear or disorder. 


The infantry battle was also quickly bogging down as both sides tried to get their wearied units to follow orders. In Tercios, any unit with even a single point of Wear requires a Discipline test to activate, which is generally 2-4 d6's with a single 6 needed to pass. 


Facing some disastrous combat results, the remaining French cavalry began to retreat, covered by musketeer fire. 


Two more Spanish units left the table, even as French units continued to take hits. This left the Spanish flank extremely vulnerable to the French cavalry, musketeers, and dragoons. 


Over on the other flank, the remaining French cavalry was hurriedly redeploying to fill gaps. However, the game came to a close as French fire routed more Spanish tercios. The French could declare themselves victors of a hard-fought battle. 

The discussion that followed the game largely centered on a couple of aspects of the rules that the group believes needs fixing. First, the ability of units to fire through 3" gaps between other units. This allows for the French to really hammer the melee-focused tercios before the Spanish are able to close. This has been changed to not allowing fire if there is a friendly unit directly to a unit's front, which means gaps need to be wider. 

Second, saber-wielding cavalry (i.e., French cavalry) was regularly being outperformed by the Spanish caballeros. They've now received a bump in their to-hit score against cavalry to even the odds.

We also discussed deployment methods and other period tactics.  

As always, a great game run by Rocky, and hopefully we'll see Tercios hit the table again soon. 

Wednesday, February 26, 2025

Painting Update - Quar, WWII

 It's been a couple months since I've shown what I've painted. So here's an update!


I finally started in on some 28mm Quar models; Coftyrans to the left and Crusaders to the right.

I changed some of the colors, especially the green on the Crusaders' coats, compared to the 15mm models. It also helped that I primed them grey instead of black, which makes missed spots more difficult to hide but brightens the colors overall.


I've also started in on the 15mm Germans for my 1940 O Group project. Above is an infantry company. If you notice that it's larger than the French company, it's due to the Germans using a "square" platoon structure in 1940 with four squads in a platoon. 

For something a little different, I've also taken to painting a bit for Turnip28. Not for any particular reason, since I'm not aware of anyone that plays locally. But it's something different. 

The above pair of models would work as a "snob", or an officer. I just added green-stuffed faces to some War of Ozz Munchkins and muddied up their pants. 

Wednesday, February 19, 2025

A Schleiz of the Action - Wars of Eagles and Empires AAR

Last weekend, HAWKS hosted their Cold Barrage convention for the second year. Cold Barrage was originally created when HMGS' Cold Wars fell through in 2024, and so a single-day event was launched to fill the void. It was so successful they decided to do it again!

I went up originally planning to play in two games based on the same system: Wars of Eagles and Empires and Wars of Ozz. Unfortunately I wasn't feeling all that well, so while I managed to soldier on through the morning, I left early.


However, I did get a chance to play in Buck Surdu's new rules, Wars of Eagles and Empires, which are a Napoleonic outgrowth from Wars of Ozz. Buck himself was running the game, so between his guidance and my familiarity with Wars of Ozz, learning the system was pretty easy.

The scenario was a refight of the Battle of Schleiz, the opening clash of the War of the Fourth Coalition in 1806.

A mass of French infantry and cavalry was marching towards the town of Schleiz, with a mixed command of Prussian reserve infantry, conscripts, and cavalry in their way. 

The French's goal was to push through the Prussian defenders, while the Prussians hope to delay the French advance. 


The Prussian players (myself included) went with an ahistorical approach compared to the dithering commanders of the past and stepped up, with two brigades swinging out to either side of Schleiz. I was controlling a reserve brigade, which I decided to move up the Prussian left flank.


French and Prussian infantry first clashed as the Prussian attempted to shift the French from a hill. In the background, you can see French battalions trying to clear out from each other's way. 


As the French had heavily weighed their assault on their left, the Prussian left was faced with only a few battalions.


Halfway through the battle, the fight on the hill was still going. I continued to bring up the reserve brigade, while French light infantry filtered through the woods. 


The battle for the hill ended with a French win; however, the Prussian battalions fell back in good order towards the cover of the woods. 

On the other side of the battle, French and Prussian cavalry clashed. I managed a decent run of wins with a hussar unit, but after several breakthroughs the unit was blown and routed from the table. 


The battle came to a close after about four hours of game time. While the Prussians had put up a valiant defense, their casualties (especially from highly accurate French artillery) gave the victory to the French. 

Overall, Buck ran a great game. The rules seem to work for what they aim for, and I still enjoy the loss of control that can occur thanks to the reaction charts. It's a fun way to depict the loss of overall army cohesion as smoke engulfs the battlefield and casualties mount. 

I've picked up a pdf copy of the rules for myself, as well as the Mexican-American War supplement.