Wednesday, March 2, 2022

One Force, Two Force, Red Force, Blue Force - The Battlefield AAR

The other game I played at the wargaming meetup was The Battlefield. I was really pleased to finally get a chance to play. I've known about this set of rules for some time now (there's even a half-finished WW2 adaption somewhere in my Google Drive...). It's goal is to simulate playing a First-Person Shooter on the tabletop, with a fantastically innovate action point system. 


Ben (who was running the game) had used the game's near-future options with some house rules for his scenario. In a war-torn city, two opposing forces have located a munitions dump with critical supplies. 

Blue Force was smaller and more elite, with a Spec Ops team, an Engineering Team, a Sniper team, two Assault Teams, a VTOL, and two armored transports. They also had two reinforcement points. 

Red Force had two Assault Teams, a Support Team, and Grenadier team, a Tank, a heavy APC, and armored transports. They had four reinforcement points. 


I was one of two Red Force commanders, controlling the Support and Grenadier teams and the two armored transports. 

Blue Force quickly captured the munitions dump by using their VTOL to drop the Spec Ops team onto the roof. 


With the heavy cover provided by the munitions building (and the heavy weapons restrictions - neither side wanted to blow the entire supplies cache up and level multiple city blocks!), Red Force was stuck trying to suppress the Blue Force infantry that was occupying the buildings. 

Meanwhile the Blue Force VTOL swung around to the side and started hammering the Red Force Tank and APC with its Rockets and Chain Guns. 


Dismounting from their transports, the Red Force infantry had to keep their heads down as they approached the munitions building. 


Unfortunately, it didn't take long for the VTOL to deal with the Tank and APC, both falling to a hail of Chain Gun fire. After making sure the Red Force infantry were tucked safe and sound in the nearby buildings, the VTOL returned back to the munitions building to provide cover to the Blue Force infantry inside. 

The Red Force transports took even less time for the VTOL to sort out, and a desperate CQC charge by Red Force infantry into the upper floors of the building fizzled out. 

With that, Red Force decided to retreat rather than try and press forward. With no mechanized support, and the VTOL patrolling the area, it would have taken a miracle for the reinforcements to reach the munitions dump. 

Ben ran a great game (which looked amazing - the smoke columns had little tea lights in them to simulate the flickering flames) and I'll happily look forward to playing more of The Battlefield in the future. 

With the (currently) ongoing invasion of Ukraine, I've been reflecting on my willingness to play games set in "modern" eras; anything from Vietnam to "ultra-modern." While The Battlefield is intended for use with modern conflicts, I think I'd rather adapt them to WWII, or use them with scifi minis like Ben has done. 

Wednesday, February 23, 2022

A Classic Clash - Command & Colors: Ancients AAR

Last weekend I made my way up to Pennsylvania to check out a local wargaming group that, while I've known about for some time, I've never had a chance to check out. 

I was very warmly welcomed by the attendees, and even got a chance to play in a couple games!


My first game was Command & Colors: Ancients, run by Cy and using his fantastic 28mm miniature collection instead of the original wooden blocks. 

A classic matchup of Carthaginians and Romans, both sides were looking to reduce the enemy force down to 8 units. 

The Romans were mostly made up of Medium and Light Infantry and Cavalry. The Carthaginians had some Medium and Light troops, but also had a mix of Warriors and Heavy Infantry as well. 


The first clash occurred up on the nearby hill, with Punic cavalry slamming into each other. Both sides managed to lose their generals, but the Romans ended up with the advantage (especially with some hot dice rolls). 


With more Light Cavalry on the Carthaginian right flank, the Italian allies were reluctant to leap into the waiting spears of the heavy Libyan infantry. 


In the center, I had hoped to use a card combination to get the jump on the Gallic Warrior warbands before they could, but I got Hannibal'ed and the Gauls surged forward into the Roman lines. 


The Carthaginians absolutely slaughtered the Roman center, trading their Gallic allies for the Roman Hastati, Principes, and Triarii. The Romans also lost their center General. 

It was a bloodbath on both sides, but the Roman flanks managed to eke out a victory. Allied Italians on both flanks (cavalry and infantry) caused just enough casualties to push the Carthaginians over the break limit. 

I really enjoyed the game. C&C:A is very quick to learn, with Cy able to teach four new players in just two-and-a-half hours. I may have to finally pick up a set myself. 

Wednesday, February 2, 2022

Painting Update - Romans

Here's an update on what I've been working on. 


I'm still trying to get through the 15mm Punic War project that I'm splitting with Josh. As he works on his Carthaginians, I'm technically done on the Romans. 


This will give me two Roman commands for use in games, Caeruleus and Rubeus.


They're pretty easy to add on to if need be. Hail Caesar asks for a 2:2:1 ratio of Hastati, Principes, and Triarii. I followed that for the basic roster of each command, with a pair of Velites units to cover the formed infantry. 


In a test game with Josh, it seemed to work well. Five formed units (seven total) gives enough choices for maneuvering, but doesn't bog down in command rolls. 

The next two command will consist of Italian allies; one command of infantry, and other command of cavalry. 

Wednesday, January 26, 2022

Brawl at Brawner's Farm - Pickett's Charge AAR

This past week's game at Ted's place was my first chance to finally play Pickett's Charge. I've had a copy of the rules for a while (and have slowly been working on 10mm minis to play with), so I was looking forward to finally getting a chance to throw some dice. 


Ted had set up a fantastic looking table to play on, and we were using Chip's well-painted 15mm collection that, as I learned to the other players' lament, were mostly made up of miniatures that are older than me! 

The scenario was adapted by Ted and Chip from the first volume of Regimental Fire and Fury scenarios. For anyone else looking to do the same, we added 5cm to the 15mm movement rates to make sure that the various brigades could get into the fight before the sun set. 

Chip and I split the Confederate command, while Ted and Steve commanded the Union. 

There were three objectives behind the scenario. Both sides wanted control of the central field and to cause casualties, but wanted to keep their own casualties to a minimum (I believe it was 30% of the total bases per side). 


The game started with a bang as Chip's tiny regiments from the Stonewall Brigade clashed with Steve's massive regiments from the Iron Brigade. 

Steve's initial volley ran hot and forced one of Chip's regiments back. 


Unfortunately my first roll of the game resulted with a Hesitant brigade. So Lawton was a turn late to the game when his regiments first started turning up. 


Chip was managing to stick it out against the massive Union regiments. In Pickett's charge, elite regiments get to roll 2 Casualty Dice every time they fire. This causes a casualty on a 4, 5, or 6. Chip's smaller regiments may not have had the firepower of the larger Union regiments, but they were able to steadily add hits to the boys in blue.  


Meanwhile, I had the two brigades from Ewell's division advancing towards the field. Ted's forces, led by Doubleday, seemed tiny in comparison. Their only advantage was that Lawton and Trimble had to advance through rough terrain, and would show up unformed unless I took the time to stop and redress the lines. 


Unfortunately, Steve's regiments ended up routing, unable to stand up to the deadly fire from the Stonewall regiments and a pair of supporting artillery batteries. This left the Union flank up in the air, and Ted had two full brigades to hold off. 


Luckily for Ted, I was commanding those brigades, and my abysmal luck meant that my regiments of supposedly "veteran" Confederate troops were stymied by a force one-third their size. 


With my advance stumbling to a halt, Steve brought up a fresh, massive regiment to hold the Union left flank. 


See that trading fire with the Union regiments wasn't working out, I decided to instead declare a charge, thinking that I could push through the Union position. 


To the table's surprise, not only did the Union hold the line, but half of the charge ended up retreating!


To reflect how, in reality, this battle took place late in the day, visibility on the table decreased each turn. This ended up saving both sides some major casualties as the artillery batteries became useless outside of a rapidly decreasing range band. 


With the decreasing light, Steve no longer needed to worry about the Confederate artillery (and I didn't have to worry about their Union counterparts). What he did have to worry about was Chip's reinforcements; Taliaferro's brigade showed up and extended the Confederate's line even further. Steve's regiment, which had been holding back the Stonewall regiments, was forced to retreat. 


It was late in the game when I finally managed to get a decent volley off and force one of Ted's regiments out of the central field. 

It wasn't looking good for the Union. While they still controlled the field, multiple regiments were in danger of being flanked. 

So Ted and Chip elected to pull back and castle up in the corner of the field, knowing that despite the near lack of light that their right flank was still covered by artillery and the Confederates couldn't reach the left flank soon enough. The fight trailed off as the full moon shown over a bloody battlefield. 

Afterwards, we tallied up the damage. The Union had managed to hold on to the field to the very end, but doing so had cost them dearly. Both sides had reached their casualty limit, but the Union had lost far more soldiers proportionally. So it ended up a deadly tie. 

We still managed to complete a scenario in around 3 hours that would take 4 to 4.5 hours with Regimental Fire & Fury. I definitely enjoyed the rules and I'm looking forward to finally using my 10mm collection at some point. I've got some smaller scenarios that they should be able to pull off. 

Wednesday, January 19, 2022

Widbrooke Common - For King & Parliament AAR

My first game of the year was at Ted's weekly game night. The guys had been playing For King & Parliament for the past few weeks, and I was more than happy to join in. 


The table was set up following the second scenario from the 'Marlowe to Maidenhythe' scenario book. 

The Royalists (Chip and Steve) had won the previous scenario with a tally of 5-0. I was joining Ted as commanders of the Parliamentarian forces. 

The Parliamentarians were on the attack in this scenario, with standard Pike battalia, Dutch-style cavalry, and a pair of field cannons. The Royalists had their flanks covered by Swedish-style cavalry and their center consisted of a number of pike-heavy, untested battalia. 

Both sides would fight until one had lost all of their victory medals. 


My main concern on the right flank was a farm occupied by a Royalist Forlorn Hope unit. I had to get rid of it before Chip's cavalry could reach me. 


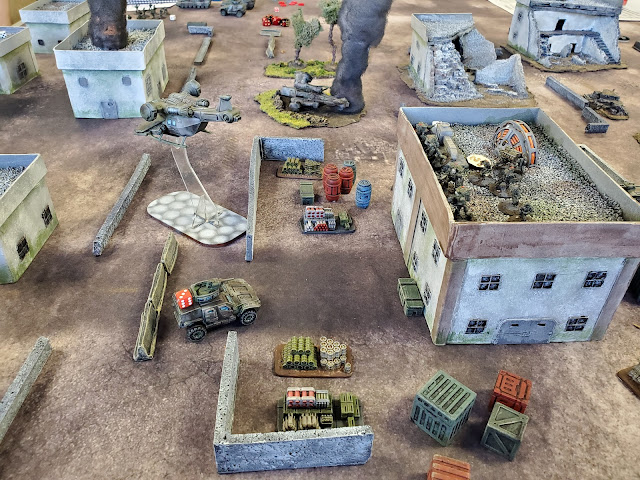
The main clash was going to take place between Steve, Ted, and I as our forces clashed in the open fields beyond the hedges. 

I got lucky with the first cannon shot of the game and gave one of Steve's infantry battalia quite the fright, which would take it out of most of the game. 


Steve's galloper cavalry got just close enough to allow Ted the chance to 'pounce' with his trotters as the infantry formed up on the cavalry's flank. 


You'll notice that the Forlorn Hope is still in the farmhouse. And that the infantry battalia I had assumed would chase the skirmishers off had not only failed to do so, but managed to accrue a couple disorder tokens as well! This didn't bode well.


And then it got worst! My infantry were so demoralized by their poor attack on the farmhouse that they ended up breaking. Chip maneuvered his cavalry through the hedges, ready to swing into the open Parliament flank.


Both sides seemed to mill about in a bloody mess as cavalry charged and countercharged. Ted pointed out to me that it was probably best if I stood off and shot instead of trying to go pike-to-pike with Steve's over-equipped battalia, so I burned through my ammunition tokens to fire at the double. 


Steve's gallopers were the first to break through the stalemate, chasing off their trotter opponents. 


I gave up on the farm and pulled my remaining battalia back over the hedge to protect the cannons. 


The Roundheads seemed to catch a break, if just for a moment. With the Royalist cavalry blown, they couldn't counter attack and Ted routed two units. 


As they're want to do in FK&P, the remaining cavalry from both sides began to chase their routing counterparts from the battlefield. If anyone managed to rally before running off the table, it could have decided the end of the game. 

I had also finally managed to rout one of Steve's infantry battalia. 


For the moment, it seemed like the Royalist center might break. 


And then on came Chip's cavalry like a hot knife through clotted cream. 

With horsemen to the front and flanks, my battalia was out of options as to how to defend their position. 


Chip wasted no time in routing not only my infantry, but the guns as well, taking out the last of the brigade.


What had seemed like a potentially precarious but positive position was now a dire, doomed defense. 

The Parliamentarian center was flanked on both sides and pinned from the front. Not only had Steve managed to rally his remaining cavalry unit, but he had re-organized the cannon-shaken battalia from the start of the game and brought it up to reinforce his line. 

Meanwhile, Ted was try to reestablish control of his trotters before they trotted right off the table. 


I sent one battalia to keep Steve's cavalry off my flanks as Ted's dismounted dragoons fired from the hedges, while my now-outnumbered troops tried to fend of Steve's infantry. 


Chip arrived at the right time to charge the flank of my commanded shot unit, easily routing them. 


Unable to get that last disordered marker on one of Steve's battalia, my own infantry was flanked in turn and routed. This removed the last of the Parliamentarian victory medals, leaving the battle as a Royalist victory, 7-0. This put the campaign's score as 12 for the Cavaliers and 0 for the Roundheads. 

As always, For King & Parliament is a fantastic set of rules that are easy to learn and quick to play. I'm always happy to see it on the table, and I'm looking forward to hopefully playing out the rest of the campaign. I'm also hoping that the rumors are right, and that Warlord Games' next 'epic' project is the English Civil War.