Wednesday, September 9, 2015

Ruinsgrave - Frostgrave AAR

After putting together I warband, I took a bunch of terrain that had been collecting dust in the basement and headed down to 7th Dimension Games to play some Frostgrave. It's been received with some interest with the others, and Cameron, one of the store employees, was my opponent for the couple games that we played. 

(By the way, we're using the alternate campaign rules from the Bad Karma blog, which can be found here.)

I unfortunately forgot to take pictures of the first game, as I was more focused on checking the rules for potential mistakes. Cameron won the game, however, with a 4-2 victory. His Apprentice used Telekinesis on one of my Treasure tokens before my own warband could reach and, and one of his Thugs ran it off the table. 

Cameron's winning allowed his Witch to set up in a Laboratory, while my Sigilist took up residence in a Library. Luckily, neither of our Warbands suffered any permanent casualties. Since I had won little gold, but found three Scrolls, I just sold all three for a decent profit and bought a Kennel to free up a slot in my Warband. But I would have to wait until after the next game to buy a new soldier. 


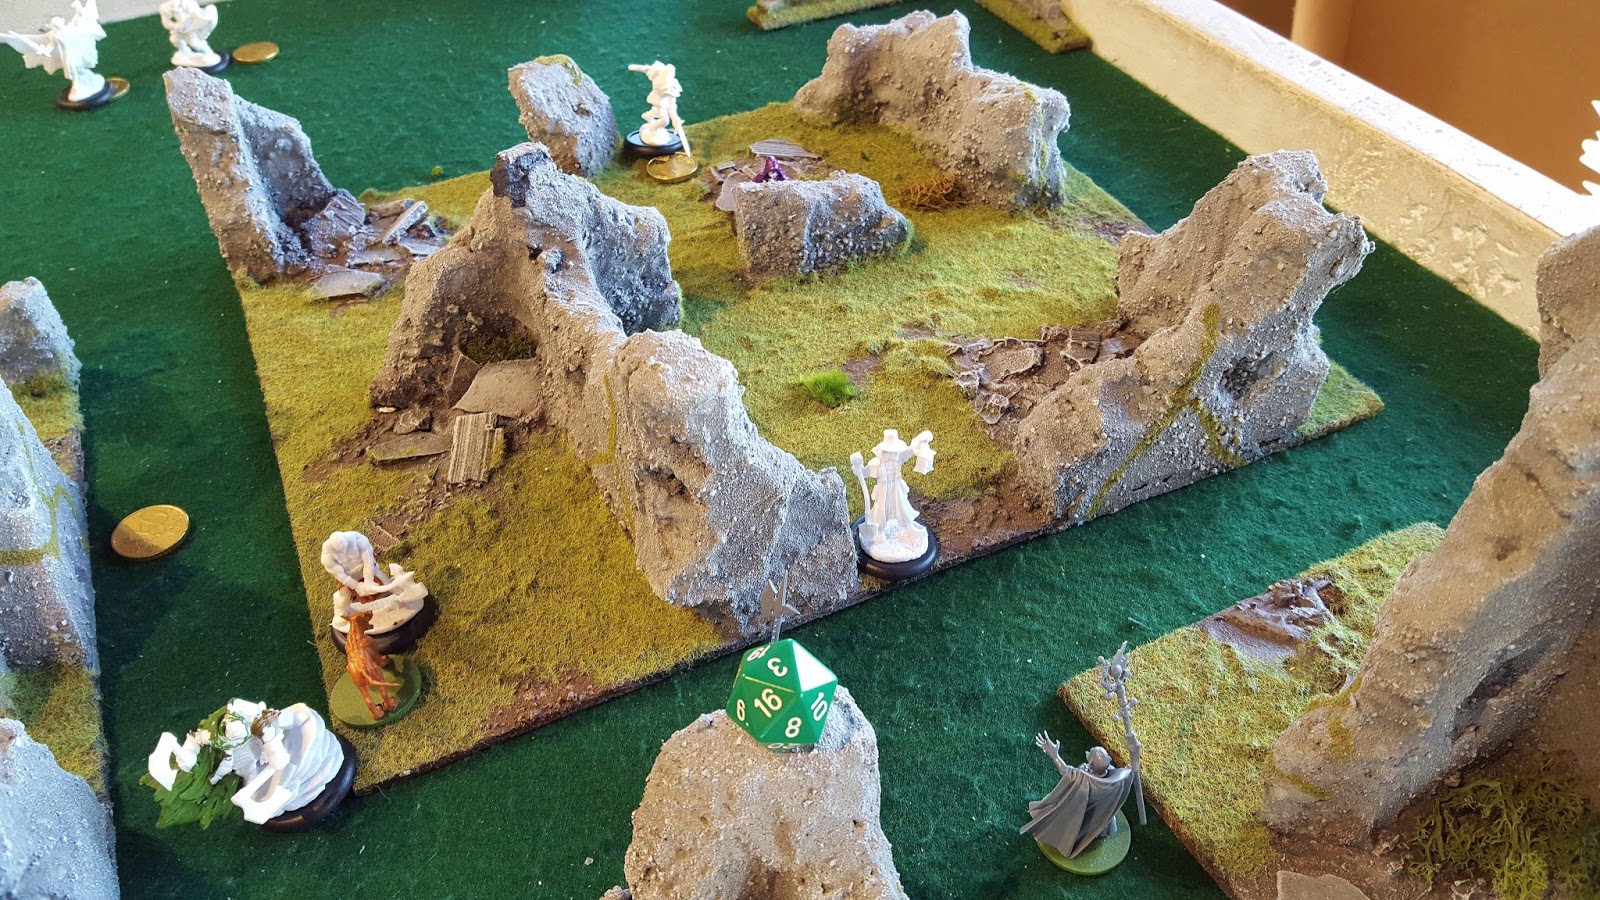
For our second game, Cameron switched the terrain around a little, since I had set up the table for the first game. 


My warband consisted of:
Wizard (Sigilist)
Apprentice
Treasure Hunter
Infantryman
Crossbowman
Archer
Thief
x2 Thugs
Warhound


Cameron's warband included:
Wizard (Witch)
Apprentice
Barbarian
Templar
Treasure Hunter
Thief
x4 Thugs
Warhound


On the left side, my Apprentice dueled with Cameron's Witch. My thief grabbed one of the Treasure markers after a failed attempt by the Witch to Telekinesis it closer. For his efforts, my Archer and Crossbowman decided to turn the Witch into a pincushion. 24 inches of range can hurt when the table is only 3 feet wide!

Meanwhile, one of Cameron's Thugs made it off the table with a Treasure, and his Thief approached another. However, that token turned out to be one of the fake markers that my Fools Gold spell had created before the game. 


My Treasure Hunter managed to grab a marker as well, but Cameron's Warhound (who had been pushed away by my Apprentice) and one of his Thugs were getting pretty close.

However, one of the treasures I had won at the end of the previous game had been a Ring of Teleportation, which I had given to the Treasure Hunter. He put the magic item to good use, teleporting 8 inches away and then running off the table with the token. 


Frustrated by the disappearance of my Treasure Hunter and one of the Treasure Markers, the enemy Warhound and Thief tried attacking my Apprentice, who was defended by the two ranged combat specialists. Neither had anything better to do, as Cameron's Witch had thrown up a magical fog bank that blocked their line of sight.


The right side was a reversal of the left - my Wizard against Cameron's Apprentice. A well-aimed Poison Dart spell had crippled my Sigilist, however, severely limiting what he could do. Because of that, another of Cameron's Thugs managed to make it off the table with a Treasure Marker, despite only having a single point of Health left. Instead, the Sigilist used Push on Cameron's spade-wielding Treasure Hunter, who had been knocking off my models at a disturbingly regular rate during both games. 

In a separate combat, Cameron's Templar and Barbarian teamed up on my Warhound, who was soundly bashed off the table. The Barbarian had gotten his revenge from the last game, when the Warhound had defeated the raging warrior.

The game ended when Cameron got the last token off the table, making it a 3-3 tie. I used my new winnings to buy some magic items - a Ring of Power (1) and a Staff of Power (2) for my spellcasters) - and to beef up my Warband. I had lost a Thug and my Warhound in the after-game results, so they were replaced. My Archer and Crossbowman were replaced by a Ranger and Marksman respectively, and I added a Knight for another melee combat beatstick. 

I believe the games went well, especially after we worked out how combat works (it's remarkably simple once you have it down). I'm hoping to get more games in this weekend, preferably with more players and using one of the scenarios in the book instead of the basic one. 

Wednesday, September 2, 2015

Skirmish in the Square - Empire of the Dead AAR

First off, I'm very happy to say that this is my 100th blog post on By Brush and Sword. I started this blog over two years ago to document my progress through the wargaming hobby and beyond, and also to share some of the incredible games I've seen and played in. I'd like to thank everyone that takes the time to read this blog - your comments and continued interests go a long way in helping me to continue posting. 

Last Saturday was supposed to be another EotD campaign day with our new gangs, and I was happy to get to use my finished Tong miniatures. Unfortunately, Carl fell ill and Bob forgot his list (and retrieving it would take another hour both ways) so I played against Gary and his Darkfire club. 


Gary set up the table, using some great paper and cardboard terrain from an old D&D set to create a country village. 


We rolled randomly for the mission and got The Prisoner (which was the same mission in the first game of EotD I'd ever played). I decided to be the defender this time, and so the Tong were guarding their captured Darkfire member in the middle of the square, awaiting a carriage to take him away. After that, well - let's just say The Inscrutable One had some questions for the gentleman that wouldn't be so gently asked. 

With that in mind, the Darkfire gang set up around the village. Some waited just out of sight behind the buildings. 


Others waited for a chance to assault the front gate. 


Basically forgetting that they were their to guard a prisoner, the majority of the gang went further into the village to confront the approaching Darkfire members. One Darkfire, already Unhinged as a result from another game, immediately fled the table after being shot at. The rest of the Tong used their weight of fire - Light Pistols may not have the range of rifles, but they still hurt, and I had a bunch of them - and their close combat skills with great results. 


The Darkfire members that had tried attacking the village's gates found themselves stopped by the sawn-off shotgun wielding Bludger, who despite having the constitution and fortitude of a kitten, blew away the one Gentleman who tried his luck and ran into the gate. Doing so triggered the Bludger's Watch and Shoot action, and the Darkfire member caught both barrels in the chest and went down hard. 

Gary's Gatling gun carrying Secretary could have turned the Bludger into a holey man, but the weapon was so bulky that its wielder was forced to either move or shoot. Deciding that moving into the sawn-off's template range was a bad idea, Gary instead began to move his remaining Darkfire members around the edges of the walls. 


They didn't have enough time to reach the fight, however. With the Darkfire Rifleman going down, it was suddenly a four-on-two fight. While my Gent of the Road went down, Gary decided to retreat rather than risk two more of his gang members potentially suffering injuries. With his concession, victory went to the Tong. 

With another successful mission came more rewards. Every model that had a Light Pistol was instead given a Heavy Pistol - apart from the Dipper and the Gent, who can only wield Light Pistols - and the Dipper managed to have his arm injury healed. Unfortunately my Gent suffered a Leg Injury, decreasing his movement speed. Which is fine, since he's there more for his +1 to Initiative rolls. 

We managed to generate some more interest in the game - probably thanks to Gary's awesome terrain - and Gary ran a demo for one of the Warmachine players, who has now joined the campaign with her Nosferatu. It's awesome to see more people take interest in the game, which should add some new blood to the group. 

Friday, August 28, 2015

Mk IV Miniatures - Terrain Review


While I have gotten plenty of mileage out of the Paper Terrain buildings that I bought some time ago, but I've always wanted some nice, 3D buildings with actual interiors. I've looked around and realized the biggest choice was whether I wanted resin or MDF. While MDF has its advantages - it can be cheaper and easier to transport - it's also highly stylized, with the edges of its construction made fairly obvious.

I found Mk IV Miniatures and, after several positive reviews, I placed an order.


These buildings are part of the "Push for the Rhine" series, and both pristine and ruined versions are available. This means you can easily mix and match, and even duplicated buildings can be unique with a little paint.


The walls are from the same series, and also come in both ruined and pristine states. You get nine wall sections, and one includes a gate.


While the detail on the walls are fantastic, it seems most of them have a "fuzzy' texture on one side, which I'm guessing is a mistake made during the casting.

I'm going to be working on these slowly, as I don't get the chance to play WWII games much these days, but they could potentially be used in games of All Quiet.

Wednesday, August 26, 2015

Ramming Speed! - Beer and Pretzels Ironclads

This past Saturday, Gary decided to pull out his collection of ACW Ironclads and put on a game of BAPI. This would be a bit different compared to our last game, however. No forts were in sight, and the ships we were using were better suited to ramming than actual gunnery (apart from the Ironclads both sides had). 

It was going to be a brawl, a knock down, drag out fight, and the winner would be the fleet with the last ship left floating. 


The attacking Union fleet was made up of four ships: the USS Hammer and the USS Slammer (both Ram-class), the USS Rambait (a Schooner-class, and the only ship on the table without a bow ram), and the USS Outtaluck (a Keokuk-class Ironclad).


The Confederate fleet, moving out from their positions along the coast, consisted of the CSS Butterbean (Cottonclad-class), the CSS Razorback (Arkansas-class), the CSS Bob, Jr. VIII (Casemate-class), and the CSS Quaker (Manassas-class). 


The two fleet approached one another at speed, bow guns blazing away at range. Gary's Butterbean and Razorback led the charge, while Bob's Bob, Jr. and Quaker used their heavier guns at range. I controlled the Union fleet until Carl arrived a few turns in, taking control of the Hammer and Rambait


As the fleets maneuvered closer, both sides began to slow to battle speed. The Hammer had Bob, Jr. in her sights, while the Slammer and Rambait turned to face the oncoming Butterbean and Razorback.


My plan to ram the Razorback from both sides failed utterly, however, as the Rebel ships got the initiative and scooted past the Union attackers. Like a vengeful schoolmarm, the Razorback let loose with her bow and starboard guns, walloping the Slammer and Rambait. Even worse, the Slammer and the Outtaluck were in danger of colliding with each other!


Luckily, the Slammer and the Outtaluck managed to slip past each other, and the Outtaluck steamed towards a new target - the Quaker!

Meanwhile the Razorback had gotten past the Rambait and opened up on the Hammer (the ship at the bottom of the picture), damaging the ship enough that she was forced to move at half speed.


With a ship-shattering impact, the Outtaluck rammed the Quaker, doing massive hull damage in the process. Unfortunately, Bob's crew quickly swarmed over my ship, killing the crew before I was able to button up belowdecks.

The Hammer was forced to watch as the Bob, Jr. slipped past, while the Razorback stalked forward.

In their own little fight, the Rambait and the Slammer tried to come to grips with the Butterbean, but the Confederate ship quickly moved away.


Hoping to do enough damage to the Bob, Jr. with my guns, I had the Outtaluck open her firing ports. The resulting crew damage from the boarders left my ship unmanned, and the Bob, Jr. pulled away - right into the ram of the Hammer, who sunk the Confederate ironclad. 

Unfortunately, the Hammer then took enough damage from the Razorback and the Butterbean, and sunk, her wreck joining the Bob, Jr. in a watery grave. 


The Confederates now had the advantage. The Quaker, having slipped through the melee, rammed the Slammer. Although she was heavily damaged, the massive crew of the Union shipped jumped aboard the Confederate ironclad and slaughtered her crew in a combat that echoed the death of the Outtaluck

Unfortunately, the valiant Rambait exploded when a round from the Butterbean went into one of her munition caches and lit off the entirety of her ammo. 

Seeing that the situation was dire - there was no way the heavily damaged Slammer was going to escape from both the Razorback and the Butterbean - I conceded the game to Gary and Bob. The Confederates had turned back the Union attack!

It was another enjoyable game, although the group did begin to realize that the ramming rules in BAPI were somewhat lacking in clarity. Gary has now begun an investigation into other potential rulesets that we can use for both his and Carl's collections. 

Additionally, I showed my copy of Frostgrave to the group and it was generally well received, with one person going so far as to grab a bunch of Reaper Bones minis that very day.  

Wednesday, August 19, 2015

Broadside of a Barn - Hail of Fire AAR

I don't think it would be any big surprise if I say that I'm a little tired of Flames of War. 

I've looked into other games, but most would require the time and effort to rebase my FoW-compliant units into single-based miniatures for the best effect. 

In a search for some new rules to use, I came across Hail of Fire, which are an in-development set of rules by Retro Boom. I was immediately interested by some of the mechanics, which seem to combine Flames of War and Crossfire!.

The one sticking point was the lack of units, and so over the past few days I've been writing out unit stats for Germans, British, and Americans, centered around June-August, 1944 (based on the Forces book that comes with the hardcover Flames of War rulebook). Hoping to get a feel for the system and at the same time test out the unit stats, I invited Curt over for a game. 


We decided to play a small game on a 4'x4' table. The objective for the game was to control the farmhouse at the middle. Curt would start as the defender on the far half of the table, effectively in control of the objective from the beginning.

This would mean that I would be playing with a timer, since there are two ways to lose in a straightforward game. Like FoW, you can lose half your units, fail a Company Check, and retreat off the table. Additionally, you can get 30 total points of chits drawn from a bag when certain conditions are met - when an enemy controls an objective and you don't, when you take a platoon or company morale check, and others. Since Curt's teams started with control of the objective, I was taking a chit every time he started his turn. (This was an additional problem since we were using chits from the Battlegroup rules, not from the HoF rules, which actually gave me higher value chits than normal.)


Not wanting to waste time, I immediately started for the objective with a good chunk of my available forces. 

In HoF, units have to make an activation check to do anything. If one passes, there's a number of actions a unit can take, and units can actually take different actions with their teams - for example, half of the teams in a unit can Concentrate Fire, and re-roll misses when shooting, while the other teams Run and roll double their movement dice.

Depending on what a unit is (Infantry, Guns, or Vehicles), they have different move speeds. Infantry move d6", Guns move d3", and Vehicles move 2d6". Running as an actions doubles these speeds. 


Curt had kept his unit of StuGs hidden for a couple turns, and then revealed them in ambush behind a hedgerow. He failed their activation, and when moving (units can only Move, Fire, or go into Ambush if they fail to activate), one of the StuGs got caught up on the terrain. 

I moved my machine guns up to avoid being shot at by the StuGs, and then moved one of my own tank platoons to keep the StuGs from moving up any further. 


I had rated Curt's Fallschirmjager infantry as MG teams (forgetting they were actually Rifle/MG in FoW), which meant that each stand was throwing out three dice each. Curt activated his infantry platoon and had them Concentrate Fire. In a single turn of shooting, he wiped out most of the HMG platoon that I had moved up, and the remaining team was suppressed. 

The above photo is actually incorrect since teams cannot have more than one suppression token on them at a time. 


Of course, any unit with a single team remaining counts as destroyed in the next turn, so the MG unit went away, and I pulled two more chits. You can see the little pile adding up their on the right.

I finally got my 6 pdrs up on the hill, and started to send my second infantry unit towards the farmhouse. I also advanced my other tank platoon towards the road, hoping to get the drop on the Tiger. 


The unit of StuGs would become Curt's bane as a commander. They constantly failed their activation checks, passing the Initiative over to me. A good round of shooting, however, knocked out the Firefly and suppressed a Sherman. 


With the initiative turned back over to me, I decided to run my infantry into the open field and try to reach the farmhouse. I was getting dangerously close to the breaking point. Unfortunately, I had forgotten that Curt's other infantry platoon had gone into Ambush, and so my infantry suffered 30 dice of shots from Curt's platoon - 15 doubled because I had ran! The infantry were suppressed, but stuck around.

Curt's Tiger was forced to retreat from the two Shermans that had moved onto the road. 


Curt's StuGs still failing to activate, I moved my infantry into contact with the farmhouse, contesting it. No sooner had I done so that Curt's infantry opened fire again, ripping into the exhausted platoon and pushing them back off the objective.


The game ended when the StuGs finally activated and Concentrated Fire. The remaining tank retreated from the table, and I had to draw two chits, which put me over the 30 limit.

While I'm going to hold off declaring a verdict about the game just yet - I want to play a few more games following the actual objective rules and with the right chits being used - I think HoF succeeds in being a company sized WWII game. The activation checks forces player to think about what their most critical actions are. Moving guns are a pain without transport. And there's actually Reaction fire (alongside Ambush fire).

I'll continue working on the lists, and hopefully more games will give me a better feel for the rules. Curt and I didn't get a chance to use the Artillery or Assault rules, for example.