Showing posts with label WoK. Show all posts

Wednesday, August 16, 2017

Painting Update - Wrath of Kings

Let's take a look at what I've managed to paint since last time. 


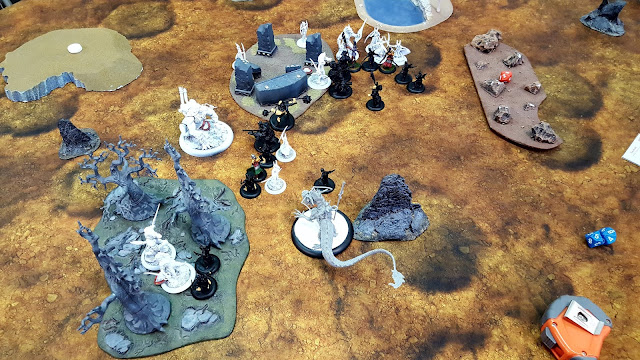
I finished the Celestials for my Shael Han force in Wrath of Kings. These guys are awesome looking. They're something of a departure from the humans and Oni-esque infantry that make up the rest of Shael Han's units, but they're still close enough in aesthetic to fit in.

I have one little quibble with the set, and it's that fact that the Leader, an Avatar of the Monkey, is actually a Chimpanzee. Chimps aren't monkeys! Ah, well.

Wednesday, April 5, 2017

Painting Update - Wrath of Kings, Blood Bowl, WWII

Let's see what's passed through the painting queue this time.


I completed another unit for my Shael Han force in Wrath of Kings. There's a dozen Lotus Warriors, who are essentially glass cannons with a 2" melee zone (which is fairly powerful in a game where most combat has to take place in base-to-base contact). Their Leaders are Black Lotuses, who can buff the offensive capabilities of the Lotus Warriors at the risk of killing them. And the Character Leader is Madam Mui, who can attack up to six times in an activation - potentially deadly if she's up against soft targets or gets extremely lucky.


Also finished are the Rank 2 Specialists available to Shael Han. The big dragon is a Fulung Devourer, painted blue to stand out among the green and red theme of the force. The three smaller models are the Character Specialists for the faction - Red Willow, Hong Yai, and Deathbloom.

This means I've completed everything available to Shael Han from the first book! After a congratulatory pat on the back, I suppose I need to get working on Book 2 units.


As the Stomping Ground Blood Bowl League continues, I've gotten to the point where I needed to add a little muscle to the Baltimork Corviks. So I grabbed a Reaper Bones Ice Troll and painted it up in the team colors.


Here's something that hasn't shown up on my blog in a while. These are a pair of Humber scout cars for my British. I'm hoping to use them either with Iron Cross or Combat HQ (or even Flames of War, depending on the release of Version 4 of the rules).

Wednesday, March 1, 2017

Clash of Titans - Wrath of Kings AAR

Gary and I got together for some Wrath of Kings - my Shael Han against his Hadross.


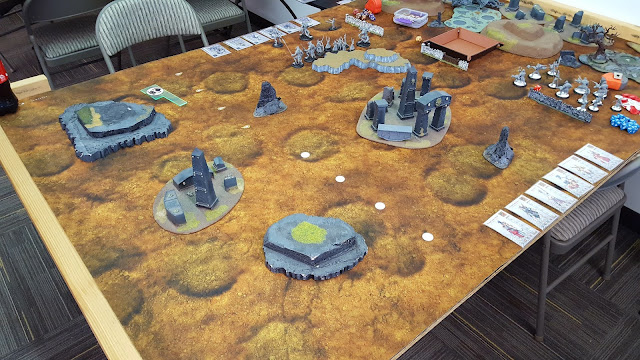
We used the same terrain that Gary brought for the Retro Raygun demo. It's all aquarium decorations, which make for some decent and relatively cheap scenery. I need to look around for anything that may match my Shael Han.


We alternated deploying our forces:

My List (Shael Han, 10 Morale, No Confidence)
Dragon Legion Keeper (Commander)
Black Lotus
Big Sister
Dragon Legionnaire x8
Iron Lotus x4
Wrath x3
Shield of Taeflon
Hammer of Heaven
Fulung Devourer

Gary's List (Hadross, 9 Morale, Unstoppable Force)
Deepman Kaxes (Commander)
Gutter Friar x2
Deepman Guardians x6
Sevridan Gutter x6
Calith Reaver
Shell Cracker
Oresund Cavalier


Our two forces advanced towards each other during the first turn.


The fighting started on my left flank, as the Wrath and Lotus warriors clash with the Sevridans and Hadross specialists.


Combat between the two sides rapidly let to multiple casualties. However, the Hadross morale loss was huge, as Gary lost three points to my chosen motivation. Since I avoided touching his Leaders, he couldn't respond in kind.


While all of the Children and Lotus infantry were lost, along with the Hammer specialist, my two leaders managed to hang on. So the Black Lotus went on the offensive, killing a pair of Deepmen and causing Gary to lose another point of morale.


Gary tried getting rid of my Big Sister, but a set of poor dice rolls left her alive. The Black Lotus finished the game by killing another two Deepmen, removing the last point of Hadross morale. Shael Han won, with 7 morale remaining.

It seems that Shael Han is a challenge for Hadross. While they're easy to hit, none of the melee modifiers that Hadross possess (turning Armor and Blocks into Hits) matter to Shael Han. Hopefully that'll change as CMON come out with more units for the factions.

Friday, January 6, 2017

Painting Update - Wrath of Kings, Guild Ball

Let's take a look at the models that have passed through the painting queue in the new year.


I've finished another set of the Shael Han infantry for Wrath of Kings - the Dragon Legion. Like the Children before, this includes the two leaders and the Character leader.


I also completed Veteran Harmony for the Masons in Guild Ball.

Wednesday, November 30, 2016

Painting Update - Horizon Wars, Wrath of Kings

I've had a deficit of AARs this month, but I've made up for it by keeping a steady stream of models passing through the painting lines. 


Complementing the infantry from my last post, these blower tanks are from the Patton Enforcement Company, another PMC under the United Mercantile Consortium's employ.


I've finally managed to get the Children in the Shael Han faction finished for Wrath of Kings. This includes the two Big Sister leaders and the Warchild character leader.

Wednesday, October 26, 2016

Shattered Glass - Wrath of Kings AAR

We're back this week with another Wrath of Kings AAR. 


Kevyn and I are still trying out new lists and Motivations. I brought some new characters while Kevyn dropped the Ravenscar mercs onto the table.

My List (Shael Han, 10 Morale, Disrupt Supply Line
Madam Mui
Dragon Legion Keeper (Commander)
Iron Lotus Warrior x10
Dragon Legionnaire x8
The Deathbloom
Hong Yao

Kevyn's List (Goritsi, 9 Morale, Assassination)
Korrad Ungarash
Ravenscar Mercenary (Commander)
Skorza Skirmisher x6
Ravenscar Mercenary x6
Shield Breaker
Scourge Hound
Ravenor Alpha


First turn was the usual slog forward. I had Hong Yao and the Deathbloom out on the flanks.


With Kevyn winning the initiative on the second turn, I managed to get the Deathbloom and Hong Yao into trouble. Luckily, Deathbloom's high Wound value and Hong Yao's resilience kept them alive (and would continue to do so through the fight).

Meanwhile, the masses of infantry converged in the center as I aimed to push through to the Supply Line tokens.


This is where things started to go downhill for the Goritsi force. The Ravenor Alpha was killed by a combined attack from Hong Yao and the three Iron Lotus Warriors that had broke off from the main group. The rest of the Iron Lotus Warriors had crashed into the Skorza line, killing off all but one of the werewolves. The Deathbloom used her Stalker ability to shift away from the Shieldbreaker and into the squishier Ravenscars. The mercenaries tried to counter attack, but failed.


While Kevyn was now at a low enough Morale level to win initiative, his force was fractured enough that there wasn't much he could do. The Shieldbreaker's Howl from Beyond ability killed off a few Iron Lotus Warriors, but the big wolf was quickly surrounded by Dragon Legionnaires.

The most damaging part of the turn was the loss of 4 Morale from two Supply Line tokens, thanks to the Deathbloom's Stalker ability and a nearby Iron Lotus Warrior.


The game then ended the next turn when the Deathbloom swept over to the Ravenscar Sergeant and tore him into shreds.

During our after-game discussion, Kevyn and I came up with two potential problems as to why House Goritsi hasn't treating him so well. The first is that he's been playing defensively with a glass-cannon faction, which I've managed to take advantage of in turns 2 and 3, smashing into his lines and wiping out large chunks of his force. The second is the perennial problem of dice. For the past few games, mine have been on fire - keeping Hong Yao alive, passing Will Checks, and hitting the top of the defensive chart time after time. Kevyn, on the other hand, could roll a dozen or more dice to try and hit one model (in this game, it was Hong Yao), and only come up with a single point of damage. Which I then saved against and prevented.

Kevyn's has taken the proper gamer's path of tossing those dice in the trash and getting a new, shiny set that will hopefully learn from their predecessor's fate.

Wednesday, October 12, 2016

Whipped Out - Wrath of Kings AAR

As predicted, not only has another Wrath of Kings AAR made it onto the website, but it features some new additions from both Kevyn and me. 


My List (Shael Han, 10 Morale, Stand Your Ground)
Dragon Legion Keeper (Commander)
Big Sister
Black Lotus
Dragon Legionnaire x7
Wrath x3
Iron Lotus Warrior x8
Hong Yao
Shield of Taelfon

Kevyn's List (Goritsi, 9 Morale, No Confidence)
Hestra Nostrollo (Commander)
Skorza Alpha
Zeti War Dancer x10
Skorza Skirmisher x4
Duke Anton don Genoria
Ravenor Alpha


Turn one was the usual advancing on both sides. The Duke took a point of damage from his degenerating body.


The fighting began on both flanks. Hong Yao charged into the Ravenor and managed to score two hits. The Ravenor, attacking back with more dice now that it was hurt, did manage to get an Overkill on Hong Yao. But one of the two Will Checks saved the damage, and Hong Yao's resilience soaked up the rest of the damage. The Ravenor flew away, knowing a bad deal when it saw one. Two Skorza Skirmishers took its place, but failed to do any damage. Another Skirmisher ran into the Wrath group, but only got a wound as a reward.

The Zeti War Dancers tried to connect with the Iron Lotuses to make room for the Duke, but failed. The retaliatory strikes from the Lotuses' whips wiped half of the War Dancers from the table, and put another wound on the duke. The Black Lotus leader took her action to gain a Stand Your Ground marker, ready for the next turn.


After winning the initiative roll, I activated the Lotuses, removing the Stand Your Ground marker from the Black Lotus and taking a point from Kevyn's moral before getting a new one. The Duke and a few more War Dancers were wiped from the table. Kevyn tried getting the Ravenor into combat, but bad rolls only put a single hit on one of the Wraths.

Hong Yao was kept busy by the lake, while the Legionnaires kept moving together. Kevyn finished the turn with the War Dancer's counter strike, taking out a chunk of the remaining Iron Lotuses. I lost a point of Moral from a failed Will Check and the No Confidence motivation.


In the last turns, I managed to activate the Lotuses again, taking out the last of the War Dancer Infantry and removing another Stand Your Ground marker. The Lotuses were then removed by Hestra. The Ravenor took out two Wraths (and doing a point of moral damage from the No Confidence motivation) before being cut down by the Big Sister and the surviving Wrath.

The Legionnaires moved to close with the Skorza Alpha, and four of them used their action to gain a Stand Your Ground Marker. Kevyn managed to kill two of them (and I lost another two points of Moral), but their activation at the beginning of the next turn removed his last two Moral. Victory went to Shael Han, but only with a 2 point lead in Moral - a very close win. 

Wednesday, October 5, 2016

Escalation - Wrath of Kings AAR

As Kevyn and I make progress with getting paint applied to figures, we decided to meet up for another Skirmish game of Wrath of Kings. We've both made some purchases for our respective factions, and this was the first chance for us to bring out the big 80mm based miniatures - the Goritsi Blood Engine and the Shael Han Fulung Devourer.


My List (Shael Han, 9 Morale, No Confidence)
Big Sister (Commander)
Dragon Legion Keeper x2
Wrath x4
Dragon Legionnaire x10
Hammer of Heaven
Shield of Taelfon
Fulung Devourer

Kevyn's List (Goritsi, 9 Morale, Steal Intel)
Hestra Nostrollo (Commander)
Skorza Alpha
Zeti War Dancer x10
Skorza Skirmisher x7
Blood Engine

Careful examination might lead some readers to doubt the list I've written. As it turns out, Kevyn forgot to place two Skorza Skirmishers during deployment! Keep that in mind as the battle progresses.


Kevyn and I spent the first turn moving forward - the Goritsi werewolves and vampires moving at breakneck speed, while the Shael Han forces worked their way in a more cautious manner. My Shael Han stayed in base contact with each other, taking advantage of the defensive buff from the Dragon Legion Keepers.


The Goritsi drew first blood, with the War Dancers leaping over the Shael Han lines, blades flashing and blood spraying. The Dragon Legionnaires and Wraths strike back, slaying a large chunk of the War Dancers. A lucky blow from one of the Wraths killed the Skorza Alpha. Somewhat worryingly to Kevyn, the Fulung Devourer's ranged magic attack managed to put a couple wounds on the Blood Engine.


The above picture might look like the turn went Shael Han's way, but that's not the whole story. More piece trading went on, with Shael Han managing to hold the advantage. One of the biggest reliefs was the Blood Engine going done from a combined assault from the Hammer of Heaven and some Dragon Legionnaires. Another Skorza Skirmisher went down to the Devourer's magic breath attack.

Midway through the turn, however, two of Kevyn's models scored hits on the Big Sister and one of the Dragon Legion Keepers. The Big Sister was killed, but more importantly, Kevyn generated two Intel tokens. Had the models carrying these tokens survived until the end of the turn, I would have lost 4 Moral point - half of my total Moral at the time.

As this happened in the middle of the turn, however, I was able to target and kill these models with my later activations, cancelling the threat of the Intel tokens. Live and learn!


The game ended when another Zeti War Dancer and Hestra Nostrollo went down, netting Shael Han another wind. Of course, Kevyn was missing a couple Rank 2 infantry from his force, which might have helped in the scrum! Expect to see some more Wrath of Kings on the blog, especially as Kevyn and I continue to expand our forces.

Wednesday, September 21, 2016

Spooky Scary Skirmishes - Wrath of Kings AAR

A recent demo and a 50% sale left me in possession of a Wrath of Kings rulebook and a Shael Han starter set. Apparently Wrath is one of those game a lot of people have heard about, but haven't bought models for. Luckily, I found a willing opponent in Kevyn, who grabbed a rulebook and a Goritsi starter for himself. 


The terrain on the table made for a proper Tellorian setting, with evil looking ruins and deserted hilltops.


For the sake of learning the rules, we decided for a simple beat-em-up at the Patrol game size.

Kevyn's List (Goritsi, 6 Moral):
Dancing Master (Commander)
Skorza Alpha
Zeti War Dancer x8
Skorza Skirmisher x2
Scourge Hound
Shield Breaker

My list (Shael Han, 6 Moral):
Big Sister (Commander)
Dragon Legion Keeper
Wrath x4
Dragon Legionnaire x4
Hammer of Heaven
Shield of Taelfon


The first turn was a fairly simple straightforward movement on both sides.


The next turn was a huge clash that saw Shael Han come out on top, thanks to their Enlightenment ability and the Defensive Insight on the Shield of Taelfon - the chance to do Backlash damage on low dice could easily take out enemy Rank 1 infantry. Kevyn lost six of his War Dancers (and two Moral) over the course of the turn, while spreading damage over my multi-wound models.


Defensive and Offensive Insights continued to give Shael Han the edge in the fight. One of my Legionnaires went down, but so did the Goritisi Shieldbreaker, Scourge Hound, Skirmishers and War Dancers (with another 2 moral!).


The two Goritisi leaders put a dent in the Shael Han forces, killing two Wrath and a second Legionnaire, but the vampire and werewolf eventually went down, decreasing the enemy's morale to 0 and ending the game.

The Patrol game went quickly, with Kevyn and I figuring out a lot of the basics as we went along (we still didn't quite get the difference between Willpower Checks and Willpower Attacks, but we figured that out in the second game).

Not wholly satisfied, we decided to bring out the majority of out starter boxes and play a Skirmish sized game with Motivations.

Kevyn's List (Goritsi, 10 Morale, Capture Prisoners):
Dance Master x2 (Commander)
Skorza Alpha
Zeti War Dancer x12
Skorza Skirmisher x6
Scourge Hound
Shieldbreaker

My List (Shael Han, 10 Morale, Call to Glory):
Dragon Legion Keeper (Commander)
Big Sister x2
Wrath x6
Dragon Legionnaire x12
Hammer of Heaven
Shield of Taelfon

For our Motivations, my Leaders and Specialists had to kill models by themselves and then pass Willpower Checks. For each successful check (up to a total of six times, which was twice the number of Leader ranks), Kevyn's Moral would decrease by 1. Kevyn, on the other hand, had a pool of three tokens (one for each of his Leader ranks). Each model killed by Kevyn's force would become a token, which then needed to be carried back into Kevyn's deployment zone. Each model that ended a round unengaged would remove the token, and I would lose two Moral.

I forgot to take a picture of the initial deployment, but it basically mimicked the first, just with more models on the table.


The first turn was, again, spent by both sides moving into position. Instead of forcing his models into the choke point between the two sets of ruins, Kevyn opted to split his force into three sections - two flanking groups of War Dancers and Dancing Masters, and the large force of mostly Skorza in the center. This was smart - I was forced to divert my Legion Keeper commander and a large portion of my Legionnaires to cover my right, which deprived both sections of certain Defensive and Offensive Insights.


The fighting began in the center, with my Hammer taking down a War Dancer and removing one point from Kevyn's Moral. However, the Hammer was quickly surrounded by a trio of Skirmishers that subdued the specialist and took him prisoner before using the Alpha's Inspire ability to then move back. This placed them out of the range of a Wrath and Big Sister Group. Meanwhile, my Legionnaires and Kevyn's War Dancers prepared to face off on the flanks.


A lot of dice went my way this turn, with the Big Sisters and Wraths breaking down the center and the Legionnaires winning the fights on the sides. Kevyn's moral took a big hit this turn, both from model loss and from the Call to Glory motivation. He did, however, manage to capture another model, and successfully brought the first prisoner into the necessary deployment zone, causing me to lose two points of Moral.


After mopping up another War Dancer, Kevyn had taken enough Moral damage that the lost of one more model would be enough, and after a couple failed attempts from the two Sisters, an impatient Wrath struck down another War Dancer for the victory.

Motivations added a lot to the game, and I liked that each side could picked their own objectives that favored their strengths. I had the advantage in knowing my cards a little better (the complexity of the Enlightenment ability prompted me to read my cards over and over), but once Kevyn gets the hang of the Goritsi, I bet I'll have a challenge on my hands, especially if he starts using the Goritsi's maneuverability to take out the Leaders and Specialists that make my infantry so good.