Showing posts with label FK&P. Show all posts

Wednesday, January 19, 2022

Widbrooke Common - For King & Parliament AAR

My first game of the year was at Ted's weekly game night. The guys had been playing For King & Parliament for the past few weeks, and I was more than happy to join in. 


The table was set up following the second scenario from the 'Marlowe to Maidenhythe' scenario book. 

The Royalists (Chip and Steve) had won the previous scenario with a tally of 5-0. I was joining Ted as commanders of the Parliamentarian forces. 

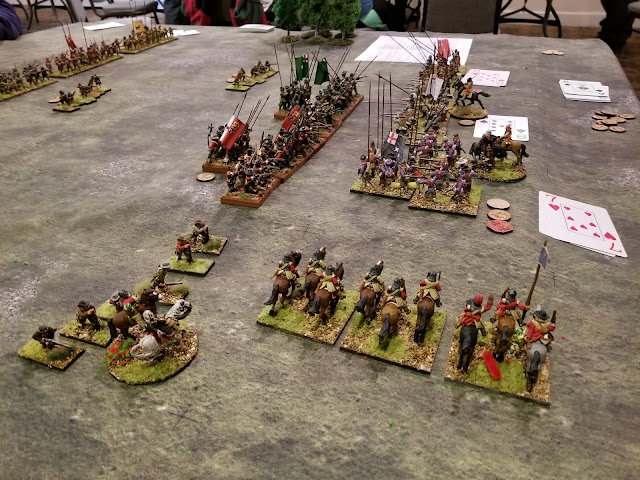
The Parliamentarians were on the attack in this scenario, with standard Pike battalia, Dutch-style cavalry, and a pair of field cannons. The Royalists had their flanks covered by Swedish-style cavalry and their center consisted of a number of pike-heavy, untested battalia. 

Both sides would fight until one had lost all of their victory medals. 


My main concern on the right flank was a farm occupied by a Royalist Forlorn Hope unit. I had to get rid of it before Chip's cavalry could reach me. 


The main clash was going to take place between Steve, Ted, and I as our forces clashed in the open fields beyond the hedges. 

I got lucky with the first cannon shot of the game and gave one of Steve's infantry battalia quite the fright, which would take it out of most of the game. 


Steve's galloper cavalry got just close enough to allow Ted the chance to 'pounce' with his trotters as the infantry formed up on the cavalry's flank. 


You'll notice that the Forlorn Hope is still in the farmhouse. And that the infantry battalia I had assumed would chase the skirmishers off had not only failed to do so, but managed to accrue a couple disorder tokens as well! This didn't bode well.


And then it got worst! My infantry were so demoralized by their poor attack on the farmhouse that they ended up breaking. Chip maneuvered his cavalry through the hedges, ready to swing into the open Parliament flank.


Both sides seemed to mill about in a bloody mess as cavalry charged and countercharged. Ted pointed out to me that it was probably best if I stood off and shot instead of trying to go pike-to-pike with Steve's over-equipped battalia, so I burned through my ammunition tokens to fire at the double. 


Steve's gallopers were the first to break through the stalemate, chasing off their trotter opponents. 


I gave up on the farm and pulled my remaining battalia back over the hedge to protect the cannons. 


The Roundheads seemed to catch a break, if just for a moment. With the Royalist cavalry blown, they couldn't counter attack and Ted routed two units. 


As they're want to do in FK&P, the remaining cavalry from both sides began to chase their routing counterparts from the battlefield. If anyone managed to rally before running off the table, it could have decided the end of the game. 

I had also finally managed to rout one of Steve's infantry battalia. 


For the moment, it seemed like the Royalist center might break. 


And then on came Chip's cavalry like a hot knife through clotted cream. 

With horsemen to the front and flanks, my battalia was out of options as to how to defend their position. 


Chip wasted no time in routing not only my infantry, but the guns as well, taking out the last of the brigade.


What had seemed like a potentially precarious but positive position was now a dire, doomed defense. 

The Parliamentarian center was flanked on both sides and pinned from the front. Not only had Steve managed to rally his remaining cavalry unit, but he had re-organized the cannon-shaken battalia from the start of the game and brought it up to reinforce his line. 

Meanwhile, Ted was try to reestablish control of his trotters before they trotted right off the table. 


I sent one battalia to keep Steve's cavalry off my flanks as Ted's dismounted dragoons fired from the hedges, while my now-outnumbered troops tried to fend of Steve's infantry. 


Chip arrived at the right time to charge the flank of my commanded shot unit, easily routing them. 


Unable to get that last disordered marker on one of Steve's battalia, my own infantry was flanked in turn and routed. This removed the last of the Parliamentarian victory medals, leaving the battle as a Royalist victory, 7-0. This put the campaign's score as 12 for the Cavaliers and 0 for the Roundheads. 

As always, For King & Parliament is a fantastic set of rules that are easy to learn and quick to play. I'm always happy to see it on the table, and I'm looking forward to hopefully playing out the rest of the campaign. I'm also hoping that the rumors are right, and that Warlord Games' next 'epic' project is the English Civil War. 

Wednesday, October 16, 2019

Battle of Lessie’s Moor - For King and Parliament! AAR

My final game of the day at Barrage 2019 was another of Ted's For King and Parliament scenarios that I'm very much a fan of. The game's card mechanics makes for some exciting, tense moments. 


The scenario is available from BigRedBat's shop, which is set in fictitious Borsetshire. It's a fairly standard English Civil War battle, with plenty of raw and untested troops facing off.

Both armies consist of a center core of infantry, with cavalry on the flanks. The Parliamentarians (which I was helping to command) had Dutch-style cavalry, artillery and Forlorn Hope Skirmishers. The Royalists had Dutch- and Swedish-style cavalry, several larger foot battalions, two commanded shot regiments, and a small unit of cuirassiers.


The Royalist cavalry started the attack, sweeping up the flank faster than the slower Dutch-style cavalry units could react to.


The Royalists also went on the attack in the center and on their left flank, with cavalry impacting on each other, infantry firing at close range, and the artillery causing chaos in the one Royalist infantry battalia that had stalled.


In For King and Parliament, Dutch-style cavalry doesn't have much of an impact when attacking, but are somewhat steadier when taking hits. Their style at time was to approach enemy units, halt, fire their guns, and then attack.


One of the Parliamentarian squadrons broke, with the Royalists cavalrymen charging off towards the baggage train away from the actual fight.


The situation for the Royalist center was desperate, however. They had lost two infantry battalia, and the Parliamentarians were pushing hard against the last opposing enemy unit.


Events were going rather nicely for the Royalists in the fight on their left flank (Parliament's right). The swifter, harder-hitting Swedish-style cavalry were cutting their Dutch-style counterparts to shreds.

It was going somewhat better for the Parliamentarian infantry. With the Royalist center no longer a threat, they could turn to face the oncoming cavalry.


However, the Royalist losses in the center and their own right flank meant that they eventually ran out of victory medals to hand over. Victory went to Parliament, and the remaining Royalists forces quit the field.

While it took a little time to remember the rules (and Ted was very helpful as always with guiding the players), they did eventually come back to me. The target numbers are pretty simple to remember (hit on 8+, save on 7+, add/subtract modifiers). The hardest part is probably calculating what number a player needs to draw equal to or higher than to activate a unit, but even this is pretty easy to figure out with the QRS.

As I already own FK&P as a pdf, I should get those miniatures I got at Fall In! down from the attic and start working on them.

Wednesday, April 10, 2019

A Brisk Engagement - For King and Parliament! AAR

On Saturday at Cold Wars 2019 I signed up for two participation games. One was For King & Parliament, a variation of To The Strongest! and put on by fellow SJGA club member Ted. 


The scenario was a recreation of the Battle of Montgomery, 1644. I was one of two Parliamentary commanders, and we faced off against three Royalist commanders.

Both sides would have six turns to score more Victory Medals. The Royalists started with an advantage in numbers, since the Parliamentarians had two units of cavalry off the table, foraging for supplies.


The infantry battle started with the two sides skirmishing with their forlorn hope units.


And the cavalry got right into the fight, with both sides charging as soon as they could.


The Parliamentarian infantry commanders were having trouble getting their orders to their troops, and so the blocks of pikemen and musketeers sat in place as the Royalists marched across the field.


The cavalry engagement quickly turned against me thanks to some truly awful card draws.


All three of my units were routed and chased from the table! This left the Parliamentary forces on the hill completely vulnerable.


My foraging units chose that moment to return to the battlefield, and were likely confused by the lack of anyone - Royalist or Parliamentarian - in the area. I started to send them after the Royalist cavalry.


But by then it was too little, too late. The Parliamentary infantry were flanked and, even after going into a "hedgehog" formation, were routed. With that, the Royalists rewrote history and claimed the field in the name of the King.

Ted was somewhat taken aback by the Parliamentarians' poor performance. We were done in just under two hours of what had been a four hour slot! But as my cavalry was so quickly wiped out, and the infantry couldn't hit the side of a barn from five paces away, the game was over rather quickly.

Even though the other Parliamentarian commander and I had some horrendous luck when it came to the card draws, we still had a great time. Like To The Strongest!, For King & Parliament is a fun, fast playing set of rules that looks good on the table.

As I mentioned in the post about what I bought at Cold Wars, I immediately went and purchased enough to start a small army in 28mm using Warlord Games' plastic and metal models. So while I supposed I've failed my "no new games" challenge, I've picked up another army to paint to completion!