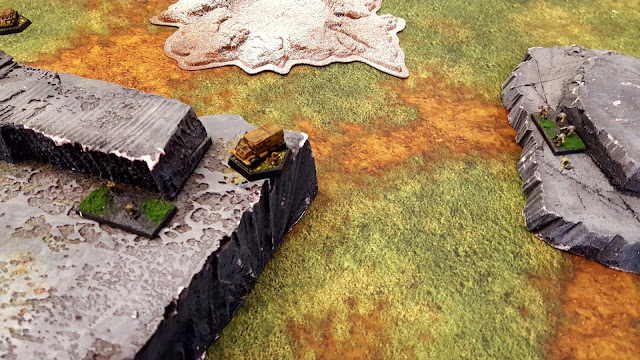
Kevyn's mech-led force would be the attackers:
P3 Mech Gold Prophet (CHQ)
P1 Mech x2
Armored Artillery
Heavy Cavalry x2
Mobile Infantry x2
Heavy Infantry
In order to win, Kevyn would need to beat down my force until only two units remained on the table at the end of a turn.
While I decided to defend with a conventional only force:
Heavy Cavalry (CHQ)
Heavy Cavalry x2
Light Cavalry x2
Heavy Infantry x2
Recon
Armored Artillery
To win, I would need to end the game with at least four units on the table, and have double the original amount of Presence.
Kevyn deployed his advanced force, while my units (the two Heavy Infantry and the Recon) were set up in hidden deployment.
In the first turn, I kept the two Heavy Infantry units hidden, but chose to reveal the Recon unit, which used its Guide Fire ability to reign down Armored Artillery fire from reserves. This was even more deadly thanks to a CR upgrade that pushed the Armored Artillery's firepower stat up to 8!
Kevyn decided to focus on the Recon unit, laying fire into their position, but poor dice and a combination of high armor and elevated cover meant few hits were scored.
Kevyn kept his units' fire concentrated on the Recon unit, not wanting to get closer to that dangerous artillery barrage, but the small infantry unit kept their heads down, receiving little damage.
I brought on the first of my reserves - a Heavy Cavalry unit - which Kevyn then tried to destroy with a charge from his Mobile Infantry. Unfortunately, the P3 vehicle out-rolled the P1 infantry, winning the close-quarters battle and causing a huge amount of damage.
It was at the beginning of Turn Three that Kevyn realized his mistake. Allowing the Recon unit to hold up a large chunk of his force meant that I had enough time to bring on the high-presence units I needed to win the game. And as the previous two turns had shown, it was unlikely that he could do enough damage to take the slightly-damaged Recon unit to stop me from winning.
Kevyn's attempt to shoot down the Recon unit allowed the infantry to react and move out of line of sight to most of his units. A desperate gamble from a long-range move from his Mobile Infantry didn't allow for a charge, and another shoot action failed to provide the necessary crits to wipe the enemy from the table.
A crit from the Armored Artillery's indirect fire did, however, take out Kevyn's other Mobile Infantry unit, and my Heavy Cavalry (along with the CHQ unit I had brought in from reserve) started to rumble forward toward's Kevyn's lines.
However, the game ended at that point - I had five units on the table (none hidden) and had doubled the original presence of the advance force.
It's nice that Kevyn and I are starting to get beyond simply trying to learn the rules, and have instead begun trying to tease the nuances out of Horizon War's ruleset. This could have been a mission in which I tried to rush into Kevyn's forces from the beginning, which probably would have been a mistake. While I had an overall advantage in available Presence, Kevyn's advance force could have been plenty to wipe my units from the table, had he been less cautious. It's definitely a lesson I'll need to keep in mind, if I end being the attacker again in this scenario.


Nice report. It's gratifying from my protective to hear discerning Wargamers notice that the game has nuance! 😄
ReplyDeleteThanks!
ReplyDelete