Wednesday, September 28, 2016

The McKettle Family Outing - Song of Drums and Tomahawks AAR

Feeling the need for some more battles in the woods, Carl, Gary and I decided to play another game of Drums and Tomahawks. 


This time we were back in the Ohio Valley at another frontier settlement - Kettletown.


Kettletown was home to the McKettle clan (and headed by its matriarchal leader, Ma McKettle), who were forced to abandon their dwellings due to the encroaching French forces and their Indian allies. The objective for this game would be to get the wagon to the opposite corner of the table.

Protecting the wagon was a Ranger Officer and his three Rangers, as well as an Indian Brave and his Warrior companion. Additionally, there were the six McKettles. The McKettle clan had never been great outdoorsmen, so they were Quality 4+, Combat 1 civilians with Muskets and the Poor Shot trait (-1 to Combat when shooting). They could, however, move as a group with the wagon, rolling 3d6 and taking the highest two dice to check for successes. The wagon was loaded with the McKettles' belongings and could only move Short distances per action.


The Indian attackers were split into two groups - one on each of the sides of the rough road cleared through the trees that the wagon would need to go down.


Each group consisted of two Elite Indian Braves, two Indian Warriors, and two Indian Youths.


The game started with a bang as a Ranger spotted and fired at an oncoming Indian, killing him outright.


Meanwhile, the other Rangers, the allied Indians, and the McKettles got the wagon rolling.


The Rangers engaged the group of Indians coming from the left...


While the McKettles and allied natives fended off the attack from the right. 


Both Indians and Rangers exchanged volleys at close range. The thick cover meant that most of the shots merely disturbed the snow-heavy branches, but one shot struck a Ranger, killing him.


Unfortunately, the Indians managed to head off the slow moving wagons. The McKettles decided to fight instead of flee.


Another Ranger went down amidst an enemy volley.


A McKettle went down, but not without a fight, as the clan struck down one of the attacking braves.


Hoping to catch the enemy while the Indian tried to scalp a fallen Ranger, the Officer rushed in with his tomahawk.


Unfortunately, he was outnumbered and quickly dispatched.


With their leader dead, the remaining Ranger and the Indian warrior fell back. The Indian brave, however, stood his ground with the McKettles.


The situation was becoming dire. The wagon was stalled and the enemy was pouring in from all sides.


Pa McKettle was felled by an enemy warclub, but as the Indian stooped to scalp his victim, Ma McKettle let the Indian have it at close range, killing the native warrior.


Another enemy Indian fell to the allied warrior's musket, but the foolhardy Indian was cut down when he ran in to try and scalp the enemy. Seeing another of his allies fall, the remaining Ranger fled deeper into the woods, hoping to escape.


The last remaining members of the McKettle clan, along with the Indian Brave, tried to hold on in the last charge of the oncoming enemy.


Unfortunately, Ma McKettle was gunned down in the crossfire, and the last two members of the McKettle clan ran from the sight of the bloody massacre. They, along with the brave, retreated after the fleeing Ranger, the victory whoops and cries of the enemy echoing through the trees.

This game was a lot closer than the previous one, with the Indian warband losing more than half their total numbers, thanks in large part to the stubbornly defiant McKettles. Once again, the Rangers failed to pull their weight, failing to activate and mostly missing in ranged and close combat. We enjoyed the scenario, which put a different dynamic on the game apart from the somewhat straitforward "bash each other until someone runs." I probably should have had the McKettles push a little harder for the opposite edge, but then we wouldn't have had the bloody skirmish in the middle of the table.

Expect more Drums and Tomahawks in the future as Gary, Carl and I think of some more scenarios to try out.

Wednesday, September 21, 2016

Spooky Scary Skirmishes - Wrath of Kings AAR

A recent demo and a 50% sale left me in possession of a Wrath of Kings rulebook and a Shael Han starter set. Apparently Wrath is one of those game a lot of people have heard about, but haven't bought models for. Luckily, I found a willing opponent in Kevyn, who grabbed a rulebook and a Goritsi starter for himself. 


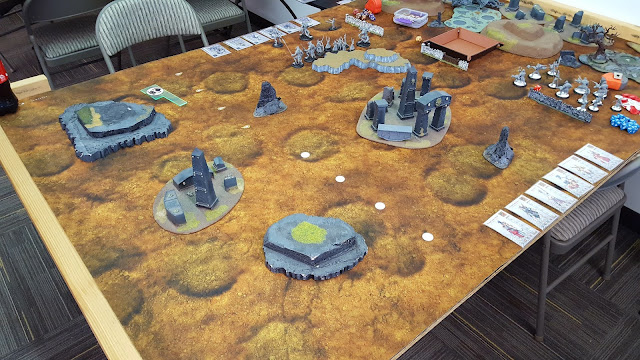
The terrain on the table made for a proper Tellorian setting, with evil looking ruins and deserted hilltops.


For the sake of learning the rules, we decided for a simple beat-em-up at the Patrol game size.

Kevyn's List (Goritsi, 6 Moral):
Dancing Master (Commander)
Skorza Alpha
Zeti War Dancer x8
Skorza Skirmisher x2
Scourge Hound
Shield Breaker

My list (Shael Han, 6 Moral):
Big Sister (Commander)
Dragon Legion Keeper
Wrath x4
Dragon Legionnaire x4
Hammer of Heaven
Shield of Taelfon


The first turn was a fairly simple straightforward movement on both sides.


The next turn was a huge clash that saw Shael Han come out on top, thanks to their Enlightenment ability and the Defensive Insight on the Shield of Taelfon - the chance to do Backlash damage on low dice could easily take out enemy Rank 1 infantry. Kevyn lost six of his War Dancers (and two Moral) over the course of the turn, while spreading damage over my multi-wound models.


Defensive and Offensive Insights continued to give Shael Han the edge in the fight. One of my Legionnaires went down, but so did the Goritisi Shieldbreaker, Scourge Hound, Skirmishers and War Dancers (with another 2 moral!).


The two Goritisi leaders put a dent in the Shael Han forces, killing two Wrath and a second Legionnaire, but the vampire and werewolf eventually went down, decreasing the enemy's morale to 0 and ending the game.

The Patrol game went quickly, with Kevyn and I figuring out a lot of the basics as we went along (we still didn't quite get the difference between Willpower Checks and Willpower Attacks, but we figured that out in the second game).

Not wholly satisfied, we decided to bring out the majority of out starter boxes and play a Skirmish sized game with Motivations.

Kevyn's List (Goritsi, 10 Morale, Capture Prisoners):
Dance Master x2 (Commander)
Skorza Alpha
Zeti War Dancer x12
Skorza Skirmisher x6
Scourge Hound
Shieldbreaker

My List (Shael Han, 10 Morale, Call to Glory):
Dragon Legion Keeper (Commander)
Big Sister x2
Wrath x6
Dragon Legionnaire x12
Hammer of Heaven
Shield of Taelfon

For our Motivations, my Leaders and Specialists had to kill models by themselves and then pass Willpower Checks. For each successful check (up to a total of six times, which was twice the number of Leader ranks), Kevyn's Moral would decrease by 1. Kevyn, on the other hand, had a pool of three tokens (one for each of his Leader ranks). Each model killed by Kevyn's force would become a token, which then needed to be carried back into Kevyn's deployment zone. Each model that ended a round unengaged would remove the token, and I would lose two Moral.

I forgot to take a picture of the initial deployment, but it basically mimicked the first, just with more models on the table.


The first turn was, again, spent by both sides moving into position. Instead of forcing his models into the choke point between the two sets of ruins, Kevyn opted to split his force into three sections - two flanking groups of War Dancers and Dancing Masters, and the large force of mostly Skorza in the center. This was smart - I was forced to divert my Legion Keeper commander and a large portion of my Legionnaires to cover my right, which deprived both sections of certain Defensive and Offensive Insights.


The fighting began in the center, with my Hammer taking down a War Dancer and removing one point from Kevyn's Moral. However, the Hammer was quickly surrounded by a trio of Skirmishers that subdued the specialist and took him prisoner before using the Alpha's Inspire ability to then move back. This placed them out of the range of a Wrath and Big Sister Group. Meanwhile, my Legionnaires and Kevyn's War Dancers prepared to face off on the flanks.


A lot of dice went my way this turn, with the Big Sisters and Wraths breaking down the center and the Legionnaires winning the fights on the sides. Kevyn's moral took a big hit this turn, both from model loss and from the Call to Glory motivation. He did, however, manage to capture another model, and successfully brought the first prisoner into the necessary deployment zone, causing me to lose two points of Moral.


After mopping up another War Dancer, Kevyn had taken enough Moral damage that the lost of one more model would be enough, and after a couple failed attempts from the two Sisters, an impatient Wrath struck down another War Dancer for the victory.

Motivations added a lot to the game, and I liked that each side could picked their own objectives that favored their strengths. I had the advantage in knowing my cards a little better (the complexity of the Enlightenment ability prompted me to read my cards over and over), but once Kevyn gets the hang of the Goritsi, I bet I'll have a challenge on my hands, especially if he starts using the Goritsi's maneuverability to take out the Leaders and Specialists that make my infantry so good.

Wednesday, September 14, 2016

Blood on the Frontier - Song of Drums and Tomahawks AAR

I've had the chance to play a variety of skirmish games recently, the latest being Ganesha Games' Song of Drums & Tomahawks, a French & Indian War themed update of their Blades & Heroes rules. I've been meaning to paint up my Muskets & Tomahawks miniatures at some point, and Drums & Tomahawks provides the perfects means to get them done in chunks. 

Carl also has a vast collection of 20mm and 28mm miniatures for the period, as well as some terrain. So we built a couple of 350 point forces (standard size for the game), and as Gary was interested, he and Carl split an Indian warband to counter my Colonial scouting party. 

Indian Warband: 
Elite Indian Brave x4
Indian Warrior x4
Indian Youth x3

Colonial Scouting Party:
Ranger Officer
Ranger x3
Frontiersman
Settler
Indian Brave
Indian Warrior


The scene was a frontier settlement somewhere in the Ohio valley in late autumn.


The scouting party, consisting of four rangers (one being an officer), two colonial tag-alongs (a Settler and a Frontiersman) and two Iroquois scouts (a Warrior and a Brave) arrived to find the settlement eerily quiet. The two colonials called out before being quieted by the ranger Officer - his two Indian guides had already begun to slink towards the woods, a bad sign.


The Rangers moved through the settlement, while the two colonists lagged behind. One of the Indian spots movement deeper in the woods.


It was a group of Algonquin warriors! The senior Indian Brave took aim with his musket, but the shot missed, slamming into a tree trunk and alerting the Algonquins.


Indian War cries began to fill the air. The Rangers formed a line, waiting for the enemy to get into range of their muskets.


Return fire from the Algonquins killed the Indian Brave. The Warrior waits, watching as the Algonquin that killed his mentor rushes forward, hoping to talk the Iroquois' scalp.


The Iroquois Warrior fired early, however - knocking over an enemy, but not fatally wounding him.


Musket fire erupted from both sides. The Algonquin killer reached his prize, but was engaged by the Iroquois Warrior.


The Rangers stayed in line, even as hot lead filled the air around them. Their fire managed to knock over several Indian attackers, but nothing seemed to kill them. The Iroquois scout found himself suddenly outnumbered.


In a flurry of tomahawks and knives, the Iroquois scout was cut down, his body falling beside his mentor's corpse. The two fallen Indians were quickly scalped, grisly trophies taken by the enemy.


One of the Rangers went down, a bullet tearing through his chest.


The Indian that killed the ranger quickly ran into the colonist's midst, scalping the fallen Ranger.


The Settler ran out of frame for the moment, but he managed to kill a lone Indian prowling over on the left edge of the firefight. The Rangers showed their mettle in this turn, felling three Indians - two with muskets and one with a thrown tomahawks.


However, the Algonquins still had the advantage in numbers, and decided to charge the colonials. The Frontiersman and another Ranger were brought down. The rest of the scouting party, demoralized from the sudden loss, started to retreat from the settlement.


Two Algonquins rushed the Ranger Officer, and the leader's green uniform was stained red as he falls.

At this point, the scouting party broke, with the Settler and the remaining Ranger fleeing back to friendly territory, the only survivors left to tell the story of the slaughter. The remaining Algonquins torched the settlement, wholly satisfied. Carl and Gary claimed victory.

What a game! While it took us a few turns to understand the activation and turn sequence, the game moved at a pretty good clip once we did. The activation of models depends on rolling dice (1-3 d6s) to see how many actions a model can take. Since all of our models were Quality 4, they needed a 4+ to activate.

Failing on 2 or more dice, however, ends the current turn, and passes it over to the enemy. So there were plenty of turns were Gary, Carl or I tried to roll two dice for activation and failed both. This can get frustrating when it occurs multiple turns in a row, leaving your force stuck in position and unable to do anything. I have been contemplating trying a different method of play, with alternating activation and two actions per model, but we should probably play with the rules for a little while longer before making any changes.

However, we did have fun, and I believe we'll keep playing with these rules as we work towards assembling larger forces for use with Muskets & Tomahawks for larger battles.

Wednesday, September 7, 2016

Skirmish at Dusk - Ronin AAR

With Osprey Game pumping out one blue book after another, Carl and I decided to revisit Ronin. Luckily, Carl has plenty of terrain and Sengoku-era Japanese miniatures, so all I had to do was show up with some dice and the proper fighting spirit. 

We decided for a quick, introductory game, so we set the points at 100. 

Carl's buntai:
Samurai (Powerful)
Ashigaru-Gashira
Ashigaru (Yumi)
Ashigaru (Yari) x2

My buntai:
Samurai (Fast)
Ashigaru-Gashira
Ashigaru (Yumi) x2
Ashigaru (Yari)


The setting was some nondescript village somewhere within the Kanto region.


Peasants returned to their homes as the sun began to dip below the horizon. A pair of consorts looked on, watching the sunset.


Unfortunately, the tranquility is about to be shattered. Carl's band of warriors arrived, hoping to stay the night in the town's inn.


From the opposite trail came my group, who serve under a lord hostile to that of Carl's group.


The two groups spotted each other and charged forward. The peasants, surprised by the sudden, fearsome noise, began to scatter.


The two groups continued to move forward. Some bow shots were exchanged, but no arrows managed to find their mark, either missing or being turned aside by armor.


The combatants met in the middle of the town square. Swords clashed as the last of the peasants ducked inside their homes.


My yari-wielding ashigaru managed to give Carl's ashigaru-gashira a blow to the head, before being chopped down. Combat proved inconclusive elsewhere.


Carl's bow ashigaru managed to stun my own bow ashigaru. The ashigaru-gashira and his underling dealt a grievous blow to their enemy, who retreated. My own samurai, in a valiant demonstration of his martial skill, kept Carl's samurai, ashigaru-gashira, and ashigaru preoccupied.


Carl's ashigaru went down, but his bow ashigaru wounded one of my own. I tried getting another ashigaru into combat, but Carl's ashigaru-gashira turned and dealt the interloper a grievous wound. 


It was starting to look dire for my buntai. Another of my ashigaru went down. My ashigaru-gashira tried to help his samurai commander, but the three attackers wouldn't let up.


Like a typhoon, Carl's buntai cut through my warriors, with only my ashigaru-gashira remaining. Realizing his lord and subordinates were all dead, the ashigaru-gashira decided to flee (likely being cut down or catching an arrow in the back for his cowardice). It was a solid victory for Carl.

I enjoyed the game, although the combat system seemed a little arcane at first, with its combination of dice and counters. Another concern we had was just how hard it was to kill people without a lucky break in dice - my samurai was able to hold off three attackers for half the game. We also thought that there wasn't much movement in the game, although that might have been because we played a low point game with only a few models on each side.

It may be that a group of samurai and ashigaru may be passing through the painting queue in the near future.