Showing posts with label Terrain. Show all posts

Wednesday, February 10, 2016

Painting Update - Wargods of Aegyptus, Guild Ball, European Village

Here's another update from the painting table. 

I completed another unit from my Wargods of Aegyptus project. 


This is technically an 11-strong unit of Asar Warriors with hand weapons, shields, and medium armor. The unit Champion, which is bought independently, is equipped in the same way and is placed in between the Musician and the Standard Bearer.

This is the second unit in my small warband of Dispossessed (followers of Osiris and Isis) for Wargods. I know just have to paint the characters - the Harbinger, Hero, Master of Words, and Priestess of Isis - and that'll be the core done. From there, I'll move onto some units and characters from other races. Probably Tethru and Sebeki.

I'm also pretty pleased with the blue/bronze color scheme. I've been considering doing the same for the other races, but decided against it. I think it'll look better if each race has their own scheme. For the Tethru, I'm thinking of using gold and purple, and green and tan for the Sebeki.


I also worked on my Union team for Guild Ball. Including Mist, this puts me at seven Union players - just shy of the eight player limit for tournaments. I'm going to be using this team for the foreseeable future, as I'm planning on running them in a tournament later in April.

One of these players - Decimate, on the right in the back row - can play for the Masons, so that gives me more options for my original team. Gutter, Fangtooth, and Rage (front-left, back-left, and back-middle, respectively) can't play for the Masons. They can, however, all play for the Brewers, as can Hemlocke, the other Union player I'm considering picking up as my eighth. I wonder if that's a sign as to what my third Guild Ball team should be, sometime in the future...

When I put up my blog post about painting Mist, I complained about the quality of the paints I used - Privateer Press' "Beaten Purple" and Citadel's Blood Red. To replace these, I used Vallejo's Game Model "Hexed Lichen" and Citadel's "Wazdakka Red." While the Hexed Lichen is great, I wouldn't want to use Wazdakka Red any more than necessary.

Additionally; back in August of last year, I talked about a few buildings I was working on for some WWII terrain. While other projects have taken up most of my painting time, I have been working on the buildings on and off, and finally managed to finish them.


The fence came together nicely, with some simple painting and washes.


The miscasting is still noticeable on some pieces, however. But it's easy to miss at arm's length.


The Barn House looks great, although I did skip painting the interior.


The same goes for the battle-damaged Continental House.


And a Western European Barn. 

These buildings ended up being pretty great, and I'm looking into picking up at least the rest of the buildings in the series, either whole or battle-damaged. This comes at the cost of realizing that the Battlefront building I bought is far bigger than the MkIV buildings - it's so large, I need to remove the top floor just to get in into scale!

Friday, January 22, 2016

Painting Update - Guild Ball Terrain

My recent experience with terrain in Guild Ball really has me fired up to get some of my own terrain for use with the local players. So, after making sure I knew what the official terrain rules were, I headed out to one of the local craft stores to peruse their shelves and see what I could find. 


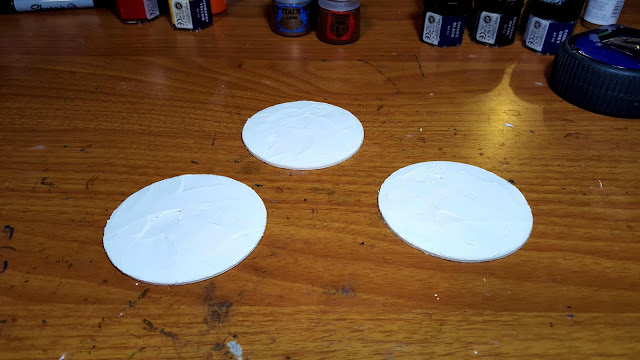
I found a baggie of thin wooden shapes - the last one! - and found, after some measuring, that the circles were perfect for what I needed. This gave me four 4.5" circles, four 2.5" circles, and six 2" circles. That's enough to cover two Guild Ball pitches in the maximum allowed amount of terrain (seven pieces). 

So, I planned to have:
1 Forest (restricted to one, maximum 6" area)
3 Rough Ground (maximum 6" area)
1 Barrier (restricted to one, maximum 3" area)
3 Fast Ground (maximum 3" area)
6 Obstacles (maximum 2" area)


The Barrier started pretty simply, with blocks of sticky-tack glued together to form a wall. Mist is here to show the height.


In the next step, I coated the sticky-tack with Citadel's gloss varnish. As the varnish dried, it hardened, making the sticky-tack less malleable. The base was then covered in spackle.


Here's the result after painting, basing, and varnishing. It's not perfect, but it'll work. The sticky-tack has also become much less malleable during the process.


The Rough Ground each had pieces of styrofoam glued down.


And then spackle was applied. I was aiming to show that there's uneven ground in these terrain pieces, while still allowing models to be places anywhere without falling over.


I did take a risk while priming these, knowing that the spray primer I was using wasn't water-based. The resulting melting, however, gave the styrofoam a much more natural look with less sharp edges.


For the Forest, I decided I could spare some trees from my collection, and added these to the base. They won't be glued down, however, so that way the trees can be removed in case a model needs to move into that particular section of the terrain. 


The layer of spackle went on around the trees, leaving holes where they would go afterwards.


Some painting, flocking, and varnishing later, the trees still fit in place!


The Fast Ground pieces were probably the easiest to get ready. They just needed a layer of spackle to start.


And to finish, they were painted, washed, and then covered in a layer of Citadel's gloss varnish (I've used that varnish more times in this project than I had in the past year).


I actually forgot to take mid-build pictures of the Obstacles, but here's the end result - cubes painted to look like crates, and thread spools that (hopefully) look like barrels.


And here's the final result. Compared to the original image, I'd say it's a half-decent turn out for a couple nights worth of work.

Now I can finally get back to painting miniatures.

Wednesday, October 28, 2015

Painting Update - Dark Ages Terrain, Kings of War

With no games played over the past weekend, I thought I'd show what little hobbying I got done in the meantime. With both a full-time job and graduate school demanding most of my time, I'm finding it difficult to squeeze in moments in which I can paint and build. But I'm getting things done, if slowly. 


I've finished up a unit of Knights and a Standard Bearer for my Kings of War Kingdoms of Men army. I'm using Games Workshop's range of Empire for them, since they offer a decent range and a local shop was having a sale. 

I'm looking to get a unit done a week, which should mean I'll have 1500 points by the new year. The last 500 points will probably come from the Undead or Dwarves in the new starter box, which'll also be a convenient way to get a copy of the rulebook. 

In painting the Knights, however, I did figure out that my usual process of painting multi-based miniatures (which was mostly made up of Flames of War stuff) isn't going to work. Normally I just get everything on the base, slap on some drydex for the basing material, and paint. That isn't going to work with these 28mm models, especially with the infantry. So now I'm in the process of removing the miniatures from the bases as I paint them, then replacing them after I've also completed the base. Hopefully I'll have some examples to show soon. 

I've also removed the Free Company models from the project, and put them on Renedra bases which match the rest of my Frostgrave models. Those miniatures are wasted in a big-battle game, and they provided me with enough models to make up a second Frostgrave warband (sans spellcasters) for demos, or general usage. This means, however, I'll have to replace them with other GW models. 


I also wanted to show the 4Grounds buildings that I used in the last SAGA battle report. These are a combination of the Anglo-Danish and High Medieval kits, which work really well together. It only took me a couple days to finish building them. The toughest part was probably the thatch roofs, which needed a couple coats of a 50/50 mix of water and glue to get the teddy bear fur to stay down.


The interiors are really well decorated, if a bit sparse - although those bits will just get in the way of your minis as they fight.


Although I probably should have been a little more careful while I was building these. Some strange runes have appeared on the floor of one of the buildings!

So, that's it for this week. I do know that Bob Fanelli's hosting another Halloween game, and if it's anything like last year's, then it's going to be tons of fun!

Friday, August 28, 2015

Mk IV Miniatures - Terrain Review


While I have gotten plenty of mileage out of the Paper Terrain buildings that I bought some time ago, but I've always wanted some nice, 3D buildings with actual interiors. I've looked around and realized the biggest choice was whether I wanted resin or MDF. While MDF has its advantages - it can be cheaper and easier to transport - it's also highly stylized, with the edges of its construction made fairly obvious.

I found Mk IV Miniatures and, after several positive reviews, I placed an order.


These buildings are part of the "Push for the Rhine" series, and both pristine and ruined versions are available. This means you can easily mix and match, and even duplicated buildings can be unique with a little paint.


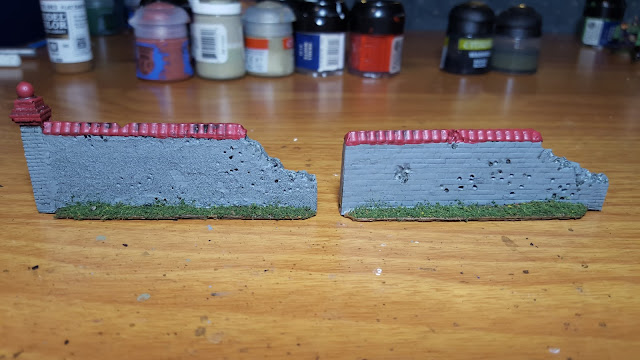
The walls are from the same series, and also come in both ruined and pristine states. You get nine wall sections, and one includes a gate.


While the detail on the walls are fantastic, it seems most of them have a "fuzzy' texture on one side, which I'm guessing is a mistake made during the casting.

I'm going to be working on these slowly, as I don't get the chance to play WWII games much these days, but they could potentially be used in games of All Quiet.

Wednesday, May 20, 2015

Big Box Terrain - Kickstarter Review

A month or so ago I received my reward for supporting Angry Mojo Games' Big Box Terrain kickstarter. The small mountain of mdf terrain sat in its box for some time before I decided to sit down and get some work done, mostly in response to the second Empire of the Dead campaign day coming up. 

So I cleared my hobby table, unpacked the box, readied my wood glue and got down to business. 


The terrain went together over the course of a couple days. I needed to take a break to allow the glue in the first kits I had assembled to dry. 

When I finished, I found myself with enough terrain to satisfactorily cover a 4'x4' paying area. If one were to treat the sarcophagi and gravestones as linear terrain that provides cover, it makes for a decent cemetery to have a shootout in, as there are plenty of places to hide.  


The entrance fence is more decorative than anything else, but it still has plenty of detail, like the individual tips of each fence-post. 


The large mausoleums have removable roofs, making them the perfect place to hide secret rites and rituals from the prying eyes of the public.  


The smaller mausoleums don't have removable roofs, unfortunately. They can still provide cover, however, or be spawning points for hordes of skeletons, ghouls and zombies. 


These spooky trees were pretty easy to assemble. The smaller trees came in two parts that slotted into each other, while the larger tree was eight individual sides that were individually slotted into three circular pieces that held the sides together.


Providing a nice place to relax (if relaxing in cemeteries is your kind of thing) is the gazebo set. The gazebo was probably the most effort intensive pieces to put together in the entire kit. It took two base pieces, fifteen individual posts and fence parts, and seventeen pieces for the roof! But it came together quite easily, providing a great (and potential malevolent to anyone named Eric) centerpiece. 

The fountain and floral-patterned benches accentuate the area. These pieces of terrain would probably work well in other settings, like a Victorian estate or American town. 


A collection of sarcophagi came with the kickstarter set, each (like the mausoleums) imprinted by a name chosen by one of the higher level backers. 


And it wouldn't be a cemetery without plenty of gravestones, and Angry Mojo didn't disappoint. Each stand has five slots, and there were plenty of headstones to chose from. Three types were both common and more numerous, but there were enough individualized headstones to make each stand different looking.

For a $50 pledge, I got enough terrain for a Empire of the Dead table, and even more for games that take place on smaller tables. While the Cemetery Set on Angry Mojo's website isn't quite as extensive, it does provide a good place to start, and could easily accentuate a table with some buildings or forests on it already.

I'm very glad to have gotten all this terrain for such a great price, and I'm looking forward to using it!