Wednesday, February 25, 2015

Take the High Ground! - One Hour Wargames: Dark Ages AAR

I'm back again this week with another test game of Alex's updated Dark Age fast-play rules. The scenario was another out of Neil Thomas' One Hour Wargames book, and featured a force of northern Strathclyde Welsh defending on top of a hill from an attack by their southern cousins. 

Alex and I controlled the southern Welsh, who fielded four Warbands unit, one Elite Warband unitone Skirmisher unit, a Leader, and a Banner. Our opponents, Bob and Bob (one being Bob Fanelli who I've talked about on this blog before, and the other being Bob from Alex's last game) had three units of Infantry, two Skirmisher units, one Elite Cavalry unit, a Hero, and a Christian Priest.


The Strathclyde started with two units on top of the hill, one Infantry and one Skirmisher. 


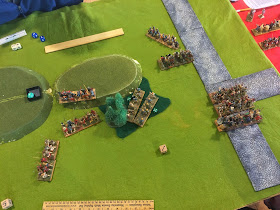
On the first turn, the Welsh had three units arrive via the road - two Warbands and the Skirmisher unit. I tried to lure the Infantry on the hill from one side to the other, and then use my Warband's faster movement to throw them off balance. It didn't work, unfortunately, but my Skirmishers did make it into combat with the Strathclyde Skirmishers by the end of the second turn while only taking a few ranged hits. 

Since only Skirmishers are allowed into woods in Alex's rules, I thought it would be important to shut down the Strathclyde's relative impunity early on. Thanks to Bob Fanelli's rolls, the slap-fight between the two groups of grown men lasted for most of the game. 


On turn three, the Strathclyde received their first reinforcements; two units, their Cavalry and an Infantry unit accompanied by the Christian Priest. These units used the road's movement bonus (+3" if the movement was entirely on the road) to get closer to the fight.


On the fourth turn, the rest of the Welsh army came onto the field, and Alex rushed them up the road. The Strathclyde Cavalry moved to block the Warbands' movement as the relatively slow-moving Infantry unit pushed for the hill, where its defensive bonuses, along with its Shieldwall ability, would grant protection in hand-to-hand combat. The other Strathclyde Infantry unit waited as it watched the two Welsh Warbands move into position. 


I wanted a close-up shot of Alex's great work on the cavalry models, which feature a banner formed from an unfortunate Empire soldier from Warhammer Fantasy. 


My Welsh Warbands finally engaged with the Strathclyde infantry, but couldn't do much, as any die roll I made was quartered thank's to the Infantry's excellent defensive position. The Strathclyde Cavalry made a few ranged attacks and then retreated, making use of its ability to turn twice while moving (Infantry and Warbands can only move once during a turn, so they must commit to a direction either before or after they advance). 


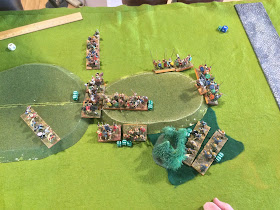
On the turn, the remaining two units of the Strathclyde army arrived, led by their Hero. I position my Warband to flank the Infantry on the hill, and hopefully defeat them before turning to deal with the new enemies. Alex's Warbands, on the right, engaged with the enemy on the hill and began to swing around, chasing after the Strathclyde Cavalry. 


Unfortunately for me, the Strathclyde Cavalry charged across the field and up the hill, flanking my flanking Warband! Since any hits caused in the flank are doubled, the Cavalry caused massive damage against my Warband, and prevented me from gaining the same benefits against the infantry on the hill. Not only that, but the newly-arrive Skirmishers were in the perfect position to begin raining arrows down on my Welshmen. 


My Warband was quickly overrun, trampled and shot to pieces. However, Alex managed to get not one, but three flank charges in the next couple turns, forcing the Cavalry to disengage and slamming into the sides and rear of the Strathclyde Infantry defending the hill. 


A close shot of the battle on the hill, with screaming Welshmen competing with the droning intonations of the Strathclyde Priest. 


Alex managed to defeat the two Infantry units on the hill, but the combat presented the Strathclyde Cavalry with another charge into the side of one of Alex's Warbands. Arrows continued to rain down into my own Warband, as the Skirmishers still fought in the woods. 


Alex and I were hanging onto a hope of perhaps pulling a victory, but in a single turn our hopes were dashed. Both the Warbands in the middle of the hills were routed, and the Welsh Skirmishers were finally driven from the woods. Now the Strathclyde had a 2:1 numerical advantage over the Welsh.


And that advantage only increased as a hail of arrows saw off one of the two remaining Welsh Warbands!


Suddenly alone and vastly outnumbered, Alex and I decided to admit defeat. 

This was definitely a tough scenario for the Welsh. The Strathclyde have a huge advantage in being able to control the hills and the woods from the get-go. The Welsh need to move quickly to make use of a small window of numerical superiority - unfortunately, this didn't happen in our game. However, while I did have to leave, Alex did tell me that Bob and Bob lost with the Welsh as well when they played a second game and switched sides. 

I think that Alex's rules are coming along nicely, and I especially like the use of the d5 "averages" dice for movement and combat, as it prevents a single good or bad dice roll from determining whether or not a unit moves when it needs to, or fights well in combat. 

Wednesday, February 18, 2015

Bloody Fords - One Hour Wargames: Dark Ages AAR, Part 2

Last week, Bob and I playtested Alex's fast-play Dark Ages ruleset. The game ended with Bob's Britons laying dead at the feet of my savage Saxons. 

After a bit of talking in which Bob and I discussed our opinions of the rules with Alex, we reset the table. This time Alex would be commanding the Britons, with Bob and I both taking half of the Saxon units. Bob would cross at one ford, and I at the other. 


Alex used his two turns of unimpeded movement to get his units across the river and turned to receive the oncoming Saxons. His Skirmishers took cover in the woods - being the only units that could. 


Much like the first game, Alex used his Infantry to stop the approaching Warbands at the river. Bob, however, decided to attach his Hero and Banner to the second unit - unlike me, who had placed them in the front rank. This would prove crucial, as the bonuses the Hero and Banner provided would be much more useful against an Infantry unit already battered and bloodied. 


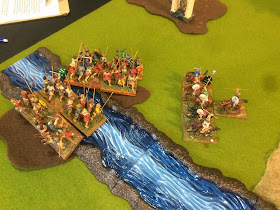
On the left - where I was in command - Alex decided to pull his Infantry further back, prompting my Warbands to move quickly across the river. Alex then decided to get a little tricky with his movement. He whipped his Cavalry around the side of the ruins, placing them at an angle that forced my lead Warband into a fight with his Infantry. Alex's Cavalry could then attack at range and then charge my Warband's flank at his pleasure!


You'll notice, of course, a distinct lack of cavalry in the above picture. That's because the second Warband unit moved 13" in a single turn and, slamming into the Cavalry at speed, routed them in a single round of combat! Rather than be flanked, Alex's Infantry fell back out of combat and began to move to a new defensive position, aiming to quickly reach the top of the hill. 


Only taking a quarter of the wounds done, Alex's Infantry stand strong at the river's edge, routing one of Alex's Warband. They still took a few more wounds than was safe, however, and Bob's Hero began to prepare his Saxons for a charge into the wearied Britons. 


Unfortunately, my Saxons turned out to be Olympian-grade sprinters, catching up and running down the fleeing Britons. 

With only his Skirmishers on the hill, Alex decided to call the retreat. One again, it seemed that in these cut down rules, any numerical advantage greatly swung the game in favor of one player or another. It may also have been the scenario, which basically focused the game into two points on the table. 

However, these games were beneficial to Alex, who has posted an updated ruleset to his own blog. Hopefully we'll get a chance to try out Alex's improvements and see how they change the game.  

Wednesday, February 11, 2015

Bloody Fords - One Hour Wargames: Dark Ages AAR, Part 1

A couple weekends ago, Alex - my old Saga opponent - asked me to help him playtest the fast-play rules he had written for Dark Age warfare. This game was the third in a series Alex has been reporting on his blog. Bob, another gamer who had been visiting the game store that day, agreed to take the role of the fleeing warband of Britons. They would have a couple turns to move onto the table and cross the river at the fords before the Saxons, played by me, would come on the table in force and give chase. 

The Britons would either have to be in control of the hill at the end of turn 15 to win, or the game would end when either side ran out of units. 

The rules Alex has written can be found on his blog. 


The terrain for the game featured a river with two crossings, with a swampy area coming out of the river into the center of the table. A small forest and some ruins were placed on either side, and a large hill dominated the other side of the table. The swamp, forest and ruins were impassible to all units apart from Skirmishers.


The Britons came on first. On the far side the Infantry and Cavalry units made it across the river quickly and set up their strongpoint. At the other crossing, the Skirmishers made it across - they could move 2d6" in a turn - while the 1d6" moving Infantry was stuck getting their feet wet in the river. 


My Saxons came on at the bottom of turn two, but a low movement roll for my initial Warband unit, which move at the same speed at Skirmishers, meant that the units that followed essentially moved into a traffic jam. Bob's Cavalry unit waited to the side of his angled Infantry, hoping to get a flank charge when my Saxons inevitably attacked.

It's important to note that in Alex's rules, Cavalry acts more like mounted Skirmishers than, perhaps, Norman knights. They have javelins to engage in ranged combat with, and can move 3d6 in a turn, but they can't take a charge as well. 


On the right, my Warband and Skirmisher units had been nipping at the Briton's heels, but the Infantry managed to make it across the water and turned to face the charging Saxons. They would be stuck in for some time, as the Infantry unit was incredibly tough. Any hits taken from the front (and that would be 1d6+2 from the warband, and 1d6 from the Skirmishers) were halved. Hits were then halved again due to where the Infantry was standing, where the water meant the river bank.


My Saxons finally engaged on the left, with the Cavalry throwing their javelins into combat. All ranged units only had three shots. This might be fine in a shorter game, but Bob and I found that the combination of such limited ammunition in a 15 turn game, along with the somewhat ineffectual amount of damage shooting did, meant that ranged units quickly turned into just slightly weaker combat units. 


An overhead shot shows all the action occurring at the river crossings. With my advantage in units, Bob was forced to keep his units at the river, rather than make for the hill, which could have also provided him with the same defensive bonuses as the riverside. 


The grinding melee on the right saw my first casualties - a Warband unit, along with the attached Hero and Banner! Whoops. Perhaps I should have let the other unit go first. 

Units in Alex's rules can take up to 15 'wounds' before being removed from the table.

Meanwhile the bowmen on both sides of the river sat back, content to let the other units beat each other up.


At the other crossing, another of my Warband units broke, meaning Bob and I were now matched in the number of units we had. On both sides I moved up my next rank of screaming Saxon infantry. 


Bob's infantry finally gave way to the grinding assault of my Saxons at the left ford, which only left his cavalry defending that crossing. 


Unfortunately for Bob, a couple of lucky dice rolls saw his Cavalry flee the field of battle as well after being chased by the fleet-footed Warbands. Bob's Skirmisher's turned to face the new threat. 

Bob's remaining Infantry unit defeated my second Warband on the right. With the Infantry severely wounded - you can see the three dice's worth of damage done - I threw my weak Skirmishers into combat. 


Bob's Skirmishers clashed with my Warbands at the foot of the hill. Unfortunately, his battered Infantry were destroyed by my charging Skirmishers. It may have cost me two-thirds of my units, but I finally controlled both river crossings. 


The last turn of the game saw Bob's Skirmisher unit defeating and routing the Warband unit it had engaged in combat with. However, with a fresh Warband to the front, and a rapidly-advancing Skirmisher unit in the rear, we decided to call the game as a victory for the Saxons. 

Bob definitely had a tough time in this scenario. He could have made a mad dash for the hill and hope to run out the clock, but being outnumbered and having to survive 15 turns did not make that an attractive option. His only other option was to get stuck in at the fords, but even with such strong defensive positions, my force was large enough that I could throw enough bodies at the shieldwalls to eventually force my way through. 

Next week will feature the same scenario, with Alex as the Briton and with Bob and I splitting command of the Saxons.